Your next big seller is here... and it's about to save your clients from the dreaded "I just ruined my nails" panic. We're talking about the Nail Polish Drying Fan, the unsung hero of every salon. Picture this: freshly painted nails, a client who's already reaching for their phone, and you—cool as a cucumber—flipping on this little lifesaver. No smudges, no tears, just perfectly dry nails in record time. Whether you're a seasoned nail tech or a spa owner looking to upgrade your toolkit, this guide will show you how to use this gadget like a pro.
Let's face it, waiting for nail polish to dry is about as fun as watching paint dry (literally). But with a nail polish drying fan, you can turn those agonizing minutes into seconds and keep your clients happy, relaxed, and most importantly—smudge-free. These fans are a game-changer for busy salons, especially when paired with other time-saving tools like Professional Gel Polish or Dipping Powder Systems. Ready to revolutionize your nail services? Let's dive in!
Why Every Salon Needs a Nail Polish Drying Fan
First things first: why bother with a drying fan when you could just... wait? Well, unless your clients have the patience of a saint (spoiler: they don't), a drying fan is a must-have. Here's why:
- Speed: Cuts drying time in half, so you can move clients in and out faster without sacrificing quality.
- Smudge-proof results: No more accidental nail imprints on your client's new jeans.
- Client satisfaction: Happy clients = repeat business. It's that simple.
Pair it with a LED Lamp for gel polish or a Cuticle Oil for a luxurious finish, and you've got a winning combo.
How to Use Your Nail Polish Drying Fan Like a Pro
Using a nail polish drying fan isn't rocket science, but there are a few tricks to maximize its effectiveness. Here's your step-by-step guide:
- Prep the nails: Start with a clean, dry base. Use a Nail Buffer to smooth the surface and apply your favorite Nail Polish.
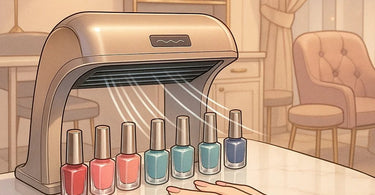
- Position the fan: Place the fan about 6-8 inches away from the nails. Too close, and you might disrupt the polish; too far, and it won't do much.
- Turn it on: Let the fan run for 1-2 minutes per hand. For extra durability, follow up with a Longwear Top Coat.
- Finish with flair: Add some Nail Art Rhinestones or a quick spritz of Aromatherapy Mist to pamper your client while they dry.
Pro Tips for Maximizing Your Drying Fan
Want to take your drying game to the next level? Try these insider tips:
- Layer lightly: Thin coats of polish dry faster. Encourage your techs to apply two thin layers instead of one thick glob.
- Combine with other tools: Use the fan alongside a Towel Steamer to keep clients cozy while their nails set.
- Clean the fan regularly: Dust and polish particles can clog the blades. A quick wipe-down with a Disinfectant Wipe keeps it running smoothly.
The Bottom Line
A Nail Polish Drying Fan isn't just a luxury—it's a smart investment for any salon looking to boost efficiency and client satisfaction. Pair it with other must-haves like Manicure Stations and Cotton Pads, and you'll be the talk of the town. So go ahead, give your clients the gift of instant gratification (and save yourself a few headaches in the process).