Stay competitive with this reality check: your client’s trust is hanging by the edge of your disinfected tweezers. In an industry built on touch and transformation, a standardized sanitation protocol isn’t just a good practice—it’s the non-negotiable foundation of your entire business. It’s what separates a professional sanctuary from a questionable setup, and it’s the silent promise you make every time a client lies back on your bed. Let’s be honest, nobody wants to wonder if the microdermabrasion tip was ‘kind of cleaned’ after its last use. Standardizing your process transforms hygiene from a worrying variable into your strongest marketing tool, building unparalleled client confidence and ensuring you pass any health inspection with flying colors.
The goal is simple: to create a system so clear, so consistent, that every team member can execute it flawlessly, creating a perfectly safe environment for every single client, every single time. This guide will walk you through the critical steps, from understanding the key terms to implementing a foolproof daily routine.
The Clean Truth: Disinfection vs. Sterilization
First, let’s clear up the beauty industry’s most common mix-up. “Cleaning,” “disinfecting,” and “sterilizing” are not interchangeable terms, and using them correctly is the first step in a professional protocol.
- Cleaning: This is step one. It’s the physical removal of visible debris, oil, and product from a tool using soap, water, and a good scrub. Think of it as clearing the playing field so your disinfectant can actually reach the germs. Skipping this step is like trying to wax over old wax—it just doesn’t work properly.
- Disinfecting: This process uses EPA-registered chemicals to kill the vast majority of pathogens on surfaces and non-porous tools. For items like wax warmer surfaces, countertops, or the exterior of devices, a proper disinfectant spray or wipe is your go-to. It requires a specific “contact time”—meaning the surface must stay wet for the full duration listed on the product label (often up to 10 minutes) to be effective.
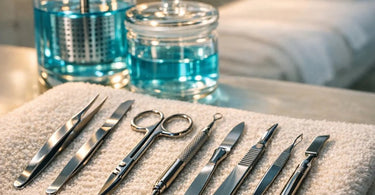
- Sterilizing: This is the gold standard. Sterilization is the complete elimination of all microbial life, including stubborn bacterial spores. This is mandatory for any tool that penetrates the skin or touches compromised tissue, such as lancets, extraction tools, and certain dermaplaning blades. As we explore on our blog, dermaplaning tools in particular require the highest level of care.
The Three Pillars of Professional Sterilization
For tools that must be sterile, there are three primary methods recognized in professional settings. Choosing the right one depends on your tool type and service volume.
1. Autoclaving (Steam Sterilization): This is the medical-grade standard and the most reliable method. An autoclave uses pressurized steam at high temperatures (around 250°F) to destroy all microorganisms. It’s ideal for all-metal tools like stainless steel tweezers, cuticle nippers, and scissors. Ensure your tools are autoclave-safe and always use them in sterile pouches with color-change indicators.
2. Chemical Sterilization: For tools that can’t withstand heat (like some plastic parts), immersion in an EPA-registered hospital-grade disinfectant is key. Products like Barbicide are industry staples. The critical rule? Follow the dilution and immersion time instructions exactly. Simply dunking tools for a few seconds is not sufficient; full immersion for the mandated 10-15 minutes is required. Always rinse and dry tools thoroughly after chemical immersion. You can find professional solutions in our Professional Cleaners & Disinfectants collection.
3. UV Sterilization: Ultraviolet light cabinets are excellent for storing already-sterilized tools and for providing a final defense against airborne contaminants. They are also useful for disinfecting surfaces of larger equipment and non-porous items like combs or the handles of massage tables. Remember, UV light requires a clear path and time to work, and it should complement, not replace, thorough cleaning and disinfection for critical tools. Explore our range of UV Sterilizers for your practice.
The Step-by-Step Protocol: From Dirty to Ready
Standardization means having a clear, repeatable sequence. Here is the unbreakable 5-step cycle for any multi-use tool:
Step 1: Pre-Clean at the Station. Immediately after use, wipe the tool to remove any excess product, wax, or debris. This prevents contaminants from drying and hardening. Have a dedicated “dirty tools” container with a lid at each station to prevent cross-contamination.
Step 2: Thorough Washing. Take tools to a dedicated utility sink. Using hot water, antibacterial soap, and a small brush, scrub every serration, hinge, and surface to remove all organic material. Rinse completely. This step is non-negotiable; disinfectants cannot penetrate built-up grime.
Step 3: Disinfect or Sterilize. Based on the tool’s use, proceed with your chosen method. For surface disinfection, spray or wipe ensuring full contact time. For immersion, use a covered, marked container with fresh solution daily. For sterilization, process in the autoclave in sterile pouches.
Step 4: Dry Completely. Moisture breeds bacteria. Use a clean, lint-free paper towel to dry tools thoroughly, paying attention to hinges and boxes. Air-drying on a clean towel is also acceptable, but tools must be completely dry before storage to prevent rust and microbial growth.
Step 5: Proper Storage. Sterilized tools must remain sterile. Store them in their sealed, dated pouches or in a clean, dry, covered UV cabinet. Clean, disinfected (but non-sterile) tools should be stored in a clean, dry, covered container. Never use airtight bags for storage, as trapped moisture can cause rust.
Beyond the Tools: Room & Equipment Turnover
Your implements are just one piece of the puzzle. A standardized protocol must cover the entire treatment environment. Allow a full 30 minutes between clients for a proper room reset.
- All Surfaces: Every single surface the client contacted must be wiped down with an EPA-approved disinfectant: the bed (even if linens were used), arm rests, magnifying lamp handles, drawer pulls, the facial steamer nozzle, and your product bottles. Don’t forget the doorknob!
- Linens: All linens, blankets, and towels must be removed after every client. Fold them inward to contain particles and place them in a lined, lidded hamper. Use fresh, laundered linens for each person. Our Salon & Spa Bedding and High-Quality Towels are designed for this professional cycle.
- Equipment: For devices like a high-frequency machine or galvanic unit, first unplug and wipe off any product residue. Then, using a disinfectant wipe or spray approved for electronics, clean all handles, cords, and surfaces, following the contact time. Consider wipeable covers for tablets or touch screens.
Building Your Hygiene Arsenal: Must-Have Products
You can’t build a fortress with flimsy materials. Stock your spa with professional-grade supplies that guarantee results.
- EPA-Registered Disinfectants: This is law for tool and surface disinfection. Choose a broad-spectrum, hospital-grade solution effective against viruses, bacteria, and fungi. Brands like Barbicide are trusted industry-wide.
- Tool Storage System: Use clearly labeled, covered containers for “dirty” and “clean” tools. Invest in an UV sterilizer cabinet for storage or an autoclave for active sterilization.
- Disposable Barriers & Applicators: Reduce cross-contamination risk wherever possible. Use hygienic table paper on beds, disposable spatulas for wax and creams, and single-use compressed sponges.
- Personal Protective Equipment (PPE): Protect yourself and your client. Always have nitrile gloves and masks available.
Seal of Trust: Documentation and Training
A protocol is only as good as your team’s execution. Standardization requires training and verification.
Create a simple, laminated checklist for between-client and end-of-day cleaning and post it in each treatment room. This ensures nothing is missed in the hustle of the day. Furthermore, maintain a sterilization log. Record the date, tools processed, cycle used (autoclave log #), and the initials of the staff member who performed it. This log is your proof of due diligence and is invaluable during inspections or if any concern arises.
Finally, make hygiene training a core part of onboarding and hold regular refreshers. When your entire team moves in sync with the same high standards, you create a culture of safety that clients can feel the moment they walk in. It transforms a chore into your clinic’s proudest signature.
By implementing these standardized protocols, you’re not just cleaning tools—you’re building an unshakable reputation. You’re ensuring compliance, protecting your clients’ well-being, and investing in the longevity of your valuable equipment. For all the professional supplies you need to build this system, from sterilizers and furniture to disinfectants and disposables, Pure Spa Direct is your trusted partner in excellence.