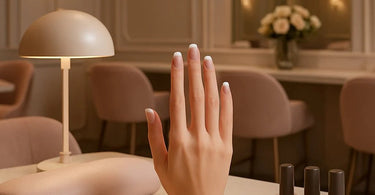
Because every detail matters... especially when it comes to creating that flawless French tip manicure your clients adore. Whether they're prepping for a wedding, a vacation, or just want to feel put together (because let's be real, French tips are the little black dress of nails), mastering this technique is a must for any nail pro. And hey, if you can make it look easy while secretly battling the urge to redo that one slightly crooked tip five times, even better! Ready to elevate your French tip game? Let’s dive into the step-by-step protocol that’ll have your clients saying "Oui!" to perfect nails every time.
First things first: gather your tools. You’ll need a high-quality base coat, sheer pink or nude polish, bright white polish (or gel if you’re going for longevity), a thin angled brush or French tip guide stickers, cuticle oil, and a fine-grit file. Pro tip: if your white polish is thicker than your client’s ex’s excuses, thin it slightly for smoother application.
Step 1: Prep Like a Pro
Start with sanitized hands and tools—because nothing ruins a manicure faster than a side of germs. Gently push back cuticles (no hacking, please!), trim and shape nails into your client’s preferred style (oval and square are French tip classics), and lightly buff the surface to remove shine. Wipe away dust with a lint-free wipe soaked in nail cleanser. Apply a base coat to protect the nail and ensure polish adheres like your client adores your skills.
Step 2: The Perfect Nude Base
Apply two thin coats of your sheer pink or nude polish, letting each dry fully. Thin coats are key—unless you enjoy the "bubble wrap" texture of rushed polish. For gel lovers, cure between coats according to your LED lamp’s instructions. This base should look like "my nails but better," not "I dipped my fingers in Pepto."
Step 3: The French Tip Magic
Here’s where the real artistry happens. For hand-painted tips (the OG method): steady your client’s hand, use your angled brush dipped in white polish, and sweep across the free edge in a smile line. Start from one side and pull toward the center, then repeat on the other side. If your first attempt looks more like a Picasso than a Parisian, don’t panic—dip a brush in polish remover to tidy up. For beginners, French tip guides are a lifesaver—just stick, paint, peel, and voilà!
Step 4: Seal the Deal
Once tips are dry (or cured for gel), lock in your masterpiece with a high-gloss top coat. Pro tip: wrap the tips with top coat to prevent premature chipping. For gel manicures, finish with a gel cleanser to remove sticky residue. Massage in cuticle oil for a luxe finish—bonus points if it smells like a tropical vacation.
Step 5: The Grand Finale
Admire your work, snap a pic for your nail art portfolio, and educate your client on aftercare: avoid using nails as tools (yes, that includes prying open soda cans), wear gloves for chores, and schedule a rejuvenating soak at their next appointment. Offer a longwear polish upgrade for clients who are rough on their hands.
There you have it—the French tip manicure, demystified! With practice, you’ll be cranking out these classics faster than your clients can say "magnifique." And remember: even if one nail rebels, a little cleanup and a confident smile will keep your client none the wiser. Now go forth and make those tips so crisp, they’ll practically whisper "baguette" every time your client waves!
)