Work smarter, achieve faster... especially when it comes to delivering flawless gel polish manicures that keep clients coming back for more! Whether you're a seasoned nail tech or just adding gel polish services to your menu, mastering this protocol means happy clients and fewer do-overs. (And let's be honest - fewer "Why is my pinky nail already chipped?!" texts at 2 AM.)
Gel polish has revolutionized the nail industry with its long-lasting wear and mirror-like shine, but proper application is key to preventing lifting, peeling, or worse - the dreaded "gel polish pop-off" during important events. Follow this foolproof step-by-step guide to create manicures that last 2-3 weeks while keeping nails healthy underneath.
Prepping Like a Pro: The Foundation of Every Great Gel Manicure
90% of gel polish failures happen because of rushed prep work. (The other 10%? Clients who can't resist using their nails as screwdrivers.) Start with sanitized hands using an antibacterial soap, then follow these crucial steps:
1. Shape & Buff: Use a 180/100 grit nail file to shape nails, then gently buff the surface to remove shine. Pro tip: Avoid over-filing - you want to rough up the surface, not create divots!
2. Cuticle Care: Apply cuticle oil, then gently push back cuticles with an orange wood stick. Never cut live tissue - this leads to infections and unhappy regulators.
3. Degrease: Wipe nails with pure acetone or a specialized gel primer to remove all oils. This step is non-negotiable - oil is the enemy of adhesion!
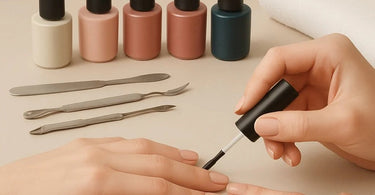
The Application Ballet: Thin Coats Win the Race
Now the magic begins! Always work with high-quality professional gel polishes - cheap formulas lead to service nightmares. Apply each layer like you're painting a miniature masterpiece:
Base Coat: Apply the thinnest possible layer, sealing the free edge. Cure under an LED lamp according to manufacturer's instructions (usually 30-60 seconds). Skipping the free edge? That's an invitation for premature peeling!
Color Layers: Apply two thin coats (never one thick coat!) of your chosen gel color, curing between each layer. Pro trick: Keep polish 1mm away from cuticles and sidewalls to prevent lifting.
Top Coat: Apply a glossy or matte top coat, again sealing the free edge. This is your shield against chips and scratches - don't skimp!
The Grand Finale: Aftercare That Keeps Clients Coming Back
Before sending clients out the door, educate them with these aftercare gems while applying a final layer of cuticle oil:
- Avoid water for 1 hour post-service (yes, this includes handwashing and tearful goodbyes to ex-boyfriends)
- Use gloves when cleaning or washing dishes (because nobody wants a perfect manicure ruined by a spaghetti pot)
- Apply oil daily (dry nails lift faster than a SpaceX rocket)
- Schedule fills every 2-3 weeks (outgrown gel polish is the beauty equivalent of flood pants - not a good look)
Troubleshooting Common Gel Polish Issues
Even pros encounter challenges. Here's your quick-fix guide:
Lifting: Usually caused by poor prep or flooding cuticles. Re-examine your prep steps and application technique.
Wrinkling: Typically from overly thick layers. Remember: Three thin coats beat one gloppy coat every time!
Bubbles: Often caused by shaking (not rolling) the polish bottle before application. Also check that your lamp's bulbs are fresh.
Stock up on all your gel polish essentials at Pure Spa Direct, where we carry top brands like CND, OPI, and Gelish. Your clients (and your booking schedule) will thank you!
)