Excellence starts with smarter tools... and when it comes to giving your clients that lit-from-within glow, nothing beats an Oxygen Infusion Facial. This isn’t just another facial—it’s like giving skin a first-class ticket to Hydrationville with a layover in Plump & Radiant City. Perfect for dull, dehydrated, or aging skin, this treatment delivers oxygen, serums, and hydration deep into the epidermis. And the best part? No downtime, no discomfort—just happy, bouncy skin. So, grab your facial serums, fire up that oxygen machine, and let’s break down the step-by-step protocol that’ll have your clients coming back for more.
Before we dive in, let’s talk about why oxygen facials are a game-changer. Oxygen is essential for cell renewal, collagen production, and overall skin health. By infusing oxygen along with potent serums, you’re turbocharging your client’s skin—helping to reduce fine lines, improve texture, and boost radiance. Plus, it’s a fantastic add-on service that upsells easily, especially when clients see (and feel) the immediate results.
Step 1: Prepping the Canvas (aka Cleansing)
Every masterpiece starts with a clean slate, and facials are no different. Begin by thoroughly cleansing the skin to remove makeup, dirt, and impurities. Use a gentle yet effective facial cleanser suited to your client’s skin type. Pro tip: Double cleanse if needed—especially if they’re wearing heavy makeup or sunscreen. Follow up with a facial steamer to open up pores and soften the skin. This step ensures maximum absorption of the oxygen and serums later on.
Step 2: Exfoliation – Bye-Bye, Dead Skin!
Now that the skin is prepped, it’s time to slough off dead skin cells. Choose a mild exfoliator—enzyme or mechanical—depending on your client’s sensitivity. This step enhances product penetration and allows the oxygen to work more effectively. If you’re using an ultrasonic scrubber, even better! It’ll give a deeper exfoliation without irritation.
Step 3: Extractions (If Needed)
If your client has congestion, now’s the time for extractions. Use a comedone extractor with care—no one wants red, angry skin post-facial. Apply gentle pressure and follow up with a soothing toner to calm the skin. Skip this step if the skin is sensitive or inflamed.
Step 4: Serum Application – The Magic Potion
Here’s where the real fun begins. Apply a high-quality facial serum packed with hyaluronic acid, peptides, or antioxidants. This serum will be infused into the skin alongside the oxygen, so choose one that targets your client’s concerns—hydration, brightening, or anti-aging. Pro tip: Warm the serum slightly for better absorption.
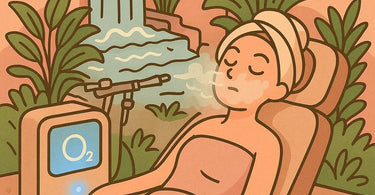
Step 5: Oxygen Infusion – Let the Glow Begin!
Time to bring out the big gun—the oxygen machine. Hold the wand about an inch from the skin and move it in slow, circular motions. The oxygen will push the serum deep into the skin while stimulating circulation. Watch as your client’s complexion transforms in real time—hello, instant glow! Most machines also have different attachments for varying intensities, so adjust based on skin sensitivity.
Step 6: Mask & Relaxation
After oxygenating, apply a soothing mask to lock in all that goodness. A hydrating or calming mask works best here. While the mask sets in, treat your client to a relaxing hand or scalp massage. They’ll leave feeling like they just had a mini-vacation—because who doesn’t love multitasking?
Step 7: Moisturize & Protect
Remove the mask, then apply a moisturizer and broad-spectrum SPF (if it’s daytime). Explain the importance of post-facial care and recommend take-home products to extend the results. Bonus points if you upsell a luxury serum or retail skincare item!
Final Thoughts: Why This Treatment Rocks
The Oxygen Infusion Facial is a win-win—clients see immediate results, and you boost your service menu with a high-demand treatment. Plus, it pairs beautifully with other services like dermaplaning or microdermabrasion. Ready to add this to your spa’s offerings? Stock up on oxygen machines and professional serums today!