Results you can rely on... and nails that will make your clients swoon! The Russian dry manicure is taking the beauty world by storm, and for good reason. This waterless technique delivers impeccable results with less mess, reduced risk of bacterial growth, and longer-lasting polish. If you haven’t added this service to your menu yet, grab your manicure essentials and let’s dive in!
Unlike traditional manicures that soak the nails, the Russian method focuses on precision dry work, making it ideal for clients with weak or peeling nails. Plus, it’s a game-changer for busy professionals who want to minimize downtime. Ready to master this technique? Follow our step-by-step guide to become a Russian dry manicure pro!
Step 1: Sanitize and Prep Like a Pro
Start by ensuring your workstation is clean and sanitized. Wipe down your nail table with a disinfectant and lay out fresh hygienic table paper. Ask your client to wash their hands with antibacterial soap, then apply hand sanitizer for extra cleanliness.
Pro Tip: Keep a towel steamer nearby for warm towel treatments later—it adds a luxurious touch!
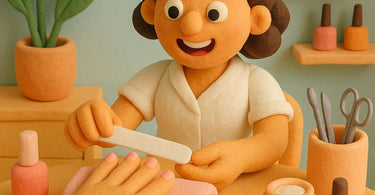
Step 2: Shape Those Nails to Perfection
Using a high-quality nail file, shape the nails according to your client’s preference. The Russian technique favors shorter, rounded, or square shapes for a clean, elegant look. Avoid over-filing to prevent weakening the nails.
Funny Moment: If your client insists on "just a little more off the top," remind them that nails aren’t a pizza—you can’t keep slicing away!
Step 3: Tackle the Cuticles (Without the Soak!)
Here’s where the magic happens. Apply a cuticle oil or softening gel to loosen the cuticles. Gently push them back with a cuticle pusher, then use precision nippers to trim any excess. The dry method allows for better visibility and control, reducing the risk of over-cutting.
Warning: Over-enthusiastic nipping leads to sad cuticles and sadder clients. Less is more!
Step 4: Buff and Smooth for a Glassy Finish
Use a buffer to smooth the nail surface, removing ridges and creating the perfect canvas for polish. The Russian technique emphasizes a flawless base, so take your time here. Finish with a fine-grit buffer for a natural shine.
Pro Hack: If your client opts for a natural look, a well-buffed nail can rival any top coat!
Step 5: Polish Like a Perfectionist
Apply a thin base coat, followed by two layers of your client’s chosen nail polish. Finish with a high-gloss top coat for durability. The dry method ensures better polish adhesion, meaning fewer chips and longer wear.
Bonus: Offer a paraffin treatment for an ultra-luxe finish!
Why Your Clients Will Love This
No water means no swelling, no lifting polish, and no bacterial breeding grounds. It’s faster, more hygienic, and delivers stunning results. Plus, it’s perfect for clients who are always on the go!
Ready to upgrade your nail services? Stock up on professional nail care products and start offering the Russian dry manicure today. Your clients’ nails (and your booking calendar) will thank you!