
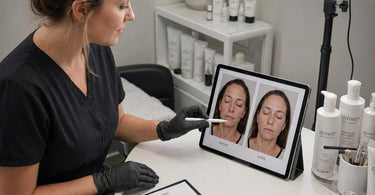
Tools that deliver, every time... especially when you snap a "before" photo that makes your client look like they haven't slept since the Bush administration. We've all been there. You nail the brow wax, the lamination is flawless, or the facial has given that skin a glow that could guide ships at sea. Then you take the "after" photo. And somehow, magically, it looks like a mugshot taken under a flickering fluorescent bulb in an abandoned subway station. It isn't you. It isn't your skills. It is almost always the light.
For spa and salon pros, lighting for photography is the secret sauce that transforms your portfolio from "meh" to "magazine cover." We aren't just wiping brows here; we are building a brand. High contrast photography is essential for showing the texture of skin, the sharpness of a Lash & Brow lift, or the smoothness of a wax service. But if your lighting is flat, orange, or casts demonic shadows under the chin, you are hiding your hard work. Today, we are fixing that. Put down the ring light (gasp) and listen up.
The Ugly Truth: Why Your Current Setup Probably Hates You
Most treatment rooms are designed for relaxation, not photography. They have warm, dimmable sconces, salt lamps, and that one overhead can light that makes everyone look like they have a unibrow. That is great for a Swedish massage; it is terrible for capturing a Hydrodermabrasion result. The struggle is real: overhead sources create Raccoon Eyes (dark sockets), while wall colors often bounce weird tones onto the skin (hello, greenish tint from your sage green accent wall). To get high contrast photography, you need to separate the subject from the background, define the texture, and avoid the dreaded "flat look." We need to see the lift, the smoothness, and the glow. So, how do we turn your 10x10 treatment cell into a studio worthy of Vogue? It starts with the angle of your light source.
The 45-Degree Rule (Or, How to Stop Hiding Your Work)
Here is the first thing you need to do: turn off the ceiling lights. I mean it. Walk over to the switch and flip it off. Trust the process. The secret to stunning high contrast photography is directional light, not ambient soup. You want one key light source to create dimension. In photography, we often use the 45/45 rule: light placed 45 degrees to the side of the client and 45 degrees above their eye line . This angle mimics natural sunlight and creates soft shadows under the cheekbones and jawline. Those shadows are your friend; they define the contour of the face and show off the results of your Dermaplaning service. If you use a ring light, you get flat, shadowless light that makes the nose disappear and the skin look artificially smooth. You don't want that. You want texture and contrast. Use an LED Bright Lamp on a stand. Swing it to the side. Watch how the face literally sculpts itself with shadow.
The Inverse Square Law: Why You Need to Stop Hugging Your Client with the Light
We aren't trying to give you a headache with physics, but there is one rule you cannot break. It is called the Inverse Square Law. Basically, the closer the light is to the client, the softer the light falls off. But for high contrast photography, you actually want a little bit of intensity drop-off. If your light is two feet away, the side of the face facing the light is bright white, and the other side is pitch black. That is too much contrast (unless you are going for a film noir villain vibe). If the light is eight feet away, the light wraps around the face more evenly, but you lose the shadow drama. The sweet spot? About 3 to 4 feet away from the client's face. This distance allows the light to wrap just enough to keep detail in the shadows, but stay strong enough to create that high contrast pop that makes pores disappear and muscle definition appear. And please, for the love of all that is holy, use a softbox or diffuser . Bare bulbs create shiny hot spots on the nose and forehead. We aren't trying to signal airplanes.
Backgrounds: The Unsung Hero of Your Before-and-Afters
Okay, you have the light dialed in. But why do your photos still look like they were taken in a storage closet? Because of the background! A busy, cluttered, or reflective background is a distraction. You are trying to show off your ingrown hair prevention skills, not your clients leftover coat on the hook. For consistent before-and-after photos, you need to standardize your background. The goal is to make the subject the star. Use a solid, neutral-colored backdrop. Matte grey, light blue, or even a clean white wall works wonders . Avoid patterns, logos, or anything that pulls the eye away from the treatment area. You want the viewer's brain to automatically compare the two images without getting distracted by the environment. If you are doing hair removal on a leg, a neutral background on the floor is just as important as a neutral background on the wall. This consistency builds credibility. When your portfolio looks like it belongs in a medical journal, clients trust you more, and they pay more for your expertise.
Let's Get Technical: The "Killer" Setup Checklist
So, you have decided to get your act together. Excellent. Here is a no-nonsense checklist to follow before every single before-and-after session. Print it out, laminate it, and put it on your treatment room door.
- Location, Location, Location: Designate a specific area in your spa or salon for photos. It doesn't need to be huge. It just needs to be dedicated. Mark the floor with tape for where the client stands and where the camera sits. Consistency is key. If you move the setup, the photos won't match.
- Clean Your Lens: This is the most common mistake! Dust, fingerprints, and that mysterious smudge from your facial oil will ruin the sharpest photos. Wipe that lens clean .
- Lock in the Camera: Do not move the camera between the "before" and "after" shot. Use a tripod or a phone holder. A few centimeters of shift changes the apparent distance and makes the comparison look staged .
- Client Positioning is Everything: Head tilt, chin angle, shoulder rotation, all of it affects how the skin reads on camera. Brief your clients on head placement before the before shot and return them to the exact same position after treatment .
- Manual Focus and Exposure: Smartphones love to auto-adjust focus and exposure. This is your nemesis. Tap the screen to manually focus on the critical area (like the cheek or brow) and lock the exposure. This ensures the "after" shot isn't brighter or darker simply because the phone got confused .
- Use Grid Lines: Turn on the grid on your phone or camera. Align the client's eyes, brows, or lips to the same grid line in every shot. This gives you a reference point for consistent framing .
The Horror Story: Inconsistent Photos Are Costing You Money
Let's be brutally honest. You are a professional. You charge for your expertise. But if you are showing potential clients blurry, inconsistent photos with bad lighting, you are telling them you are not a professional. It communicates that you are careless, that you don't care about the details. In the beauty industry, perception is everything. If your brow lamination looks okay in a dark photo, but the client sees a bright, crisp photo from a competitor, where do you think they are going? You are losing bookings. You are losing the ability to charge premium prices . Inconsistent imagery erodes trust and weakens your online presence, and we aren't just talking about Instagram. This is about conversion. Potential clients are looking at your website and your social media for proof. They want to see results. If they can't see them clearly, they will move on to someone who can show them.
Your New Best Friends: Pure Spa Direct Tools for the Perfect Shot
You might be thinking, "This sounds great, Beth-Ann, but I'm a one-woman show. I don't have studio lights." Oh, but you do! Pure Spa Direct has you covered with tools that make this process a breeze. To get that consistent, flattering light, you need a reliable source. Our LED Bright Lamps are perfect for this. They provide a crisp, neutral light that won't distort skin tones. Need something portable? Check out our Magnifying Lights for a 2-in-1 solution that helps you see the fine details during your service and captures them beautifully on camera.
And to make sure your background is as professional as your lighting, consider a sleek Hygienic Table Paper. You can roll it out behind the client, or even use it to cover a wall, creating a fresh, clean, and distraction-free backdrop every single time. It's hygienic, it's professional, and it looks great in photos. Let's get you set up for success.
Conclusion: Level Up Your Brand, One Photo at a Time
Investing a few minutes in consistent lighting and backgrounds isn't just about taking a pretty picture. It is about protecting your reputation, building client trust, and closing more sales. It allows your incredible work to speak for itself. So, take the time to set up your space, create a system, and never settle for a bad photo again. Your portfolio (and your bank account) will thank you. Now, go take some photos that actually show how amazing you are.
)