
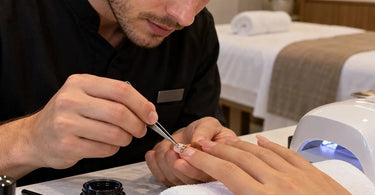
Tools designed to make your life easier... should not suddenly turn into a miniature carnival ride on a client's fingernail. Yet anyone who works with dimensional nail art has probably watched a perfectly positioned charm rotate, slide, tilt, or wander the moment the hand starts moving toward the curing lamp. Understanding why nail charms spin or shift before they are fully secured can make detailed sets faster, cleaner, and far less likely to inspire the highly technical salon phrase, "No, no, no... stay right there!"
The movement usually comes down to a combination of adhesive viscosity, charm shape, nail curvature, placement pressure, gravity, and the amount of time between positioning and curing. A charm may look perfectly centered when the technician releases the pickup tool, only to drift a millimeter sideways or rotate before the adhesive has enough structure to hold it. With small rhinestones that movement may barely register. With bows, crosses, flowers, stars, chains, or other directional pieces, one little rotation can completely change the design.
The Adhesive May Be Too Fluid for the Charm
One of the biggest variables is the consistency of the product underneath the embellishment. Thin gel products can level beautifully on a nail, but that same self-leveling behavior may encourage a dimensional charm to move before curing. The heavier or more top-heavy the charm is, the more noticeable the problem can become.
For larger pieces, many nail professionals prefer a thicker adhesive gel, builder-style gel, or product specifically intended for attaching dimensional decorations. Greater viscosity gives the charm more of a supportive cushion rather than allowing it to float across a slick surface. Professionals shopping for decorative service supplies can explore Nail Art Supplies and Nail Art Rhinestones when building out their nail art inventory.
The goal is not simply using the thickest product possible. It is matching the attachment product to the size, weight, underside, and profile of the decoration while following the manufacturer's application and curing directions.
A Curved Nail and a Flat Charm Are Not Always Best Friends
Take a close look at the underside of a charm and compare it with the client's nail. A relatively flat charm sitting on a strongly curved nail may touch at only one or two small points. That limited contact gives the piece room to rock, pivot, or rotate.
This is especially noticeable with larger metal decorations. Pressing harder is not necessarily the solution. Excessive pressure can simply squeeze adhesive away from the areas where support is needed. Instead, the attachment medium should create an appropriate seat underneath the charm so the piece can rest in the intended orientation without wobbling.
Smaller embellishments can sometimes follow the nail's contour more naturally. Large statement pieces demand more attention to contact points. Before adding adhesive, placing the charm temporarily over the nail can help the technician see whether it naturally sits level or behaves like a tiny rocking chair.
Too Much Product Can Make the Charm Float
If a little adhesive is good, a swimming pool of adhesive must be better, right? Unfortunately, nail charms did not get that memo.
An oversized bead can allow a charm to float on top rather than seat firmly into the material. When the finger changes angle, the charm can migrate with the uncured product. Excess material may also squeeze visibly around the decoration, creating extra cleanup and potentially changing the appearance of an otherwise crisp design.
Use enough product to establish solid contact and support without burying the charm in an uncontrolled puddle. The appropriate quantity varies according to the decoration and the adhesive system, which is another reason standardized salon procedures can be helpful when several technicians offer dimensional nail art services.
Too Little Product Creates a Different Problem
The opposite extreme is not ideal either. When there is not enough attachment material beneath a charm, only a tiny portion of its underside may connect with the nail. The decoration can pivot around that contact point before curing, almost like a compass needle.
This is where careful inspection becomes important. Nail art is tiny, but the mechanics are not. The objective is stable contact beneath the relevant portions of the charm while keeping the finished application neat.
A fine nail art brush can also help technicians control product around difficult shapes. Browse Nail Brushes & Tools for professional tools used in detailed manicure work.
Charm Shape Can Encourage Rotation
A round rhinestone rotating ten degrees usually looks exactly like... a round rhinestone. A bow rotating ten degrees suddenly looks like it has had a very long Monday.
Directional charms reveal movement much more dramatically. Rectangular crystals, butterflies, letters, moons, crosses, bows, elongated stones, and geometric decorations all have a visually obvious top, bottom, or centerline. Even slight movement can therefore look like a major placement error.
These pieces deserve a little extra planning. Decide on their exact orientation before applying the adhesive. Having the design mapped out reduces the amount of poking, nudging, rotating, and second-guessing required once uncured product is involved.
The Charm Was Released Before It Was Stable
A technician may place a charm perfectly and immediately lift the wax pencil, tweezer, or pickup tool away. Depending on the attachment medium, that quick release can allow the piece to rebound, tilt, or drift.
Controlled placement works better. Set the piece into the product and give it a moment to settle into its intended position. Check alignment from more than one angle. A charm can appear perfectly straight from the technician's seated perspective while actually leaning to one side when viewed from the tip of the nail.
For detailed embellishment work, good illumination is not a luxury. It is part of precision. LED Bright Lamps can help technicians see tiny placement differences, while an organized Nail Table or Manicure Station can keep tools within comfortable reach.
The Trip to the Lamp Can Undo Perfect Placement
Sometimes nothing is wrong with the actual application. The charm moves because the finger moves.
A perfectly positioned embellishment may shift when the client turns the hand, reaches toward the lamp, bumps another finger, or tilts the nail while entering the curing unit. Uncured gel remains movable until the applicable curing process begins, so careful handling during this short window matters.
For elaborate designs, technicians may use a brief initial cure where appropriate for the specific product system to help hold a successfully positioned decoration before proceeding with additional work. Full curing still needs to follow the manufacturer's directions for the gel and lamp being used. Do not substitute an improvised curing schedule for the product manufacturer's instructions.
Surface Preparation Still Matters
A charm is only one part of the service. The surface underneath it also matters. Dust, oils, residue, or an improperly prepared nail enhancement can interfere with the attachment system and make precise placement harder to maintain.
Keep the work area clean and perform preparation according to the manicure system being used. Professionals can stock everyday Manicure Essentials, Nail Files & Buffers, and Professional Cotton, Sponges, and Wipes to support consistent prep and cleanup routines.
Be especially careful not to transfer oils by repeatedly touching prepared surfaces or the underside of decorations with bare fingers. Pickup tools and tweezers provide more precise handling and keep those tiny pieces from launching across the manicure table, never to be seen again until approximately six months later.
Seal Around the Charm Without Hiding the Pretty Part
Once the decoration has been properly positioned and cured according to the product instructions, the perimeter may need additional reinforcement depending on the system and type of charm. A detail brush can provide much more control than a full-size bottle brush when working around dimensional pieces.
The objective is generally to reinforce vulnerable edges without unnecessarily coating decorative surfaces that are meant to remain exposed. Faceted rhinestones, crystals, metallic details, and textured charms can lose some of their visual definition if they are completely flooded with clear product.
Think support around the structure rather than turning every rhinestone into a tiny gel snow globe.
Large Charms Need More Support Than Tiny Rhinestones
It is useful to treat dimensional nail decorations as different categories rather than assuming every embellishment can be attached using one identical technique. Tiny flat-back rhinestones have very different weight and leverage characteristics from large metal bows or jewelry-style pieces.
A tall charm creates more leverage if it catches on clothing or hair. A wide charm may span more of the nail's curvature. A heavier charm places greater demands on its attachment point. As designs become larger and more dimensional, thoughtful placement becomes increasingly important.
Placement can also affect everyday wear. Positioning a large charm too close to a free edge or sidewall may expose it to more knocks and snagging. The most dramatic location is not always the most practical one, especially for clients who type, wear gloves, work with their hands, or prefer longer wear between appointments.
Match the Design to the Client's Real Life
That enormous jeweled butterfly may be gorgeous. It may also have strong opinions about sweaters.
Before committing to highly dimensional nail art, ask about the client's routine. Someone attending a special event may happily wear an elaborate statement set for a shorter period. Another client may need lower-profile embellishments that work comfortably with office tasks, childcare, frequent hand washing, gloves, or other daily activities.
This consultation is also a valuable opportunity to establish expectations. Dimensional decorations experience mechanical stress in ways a simple gel color does not. Careful application can improve stability, but nail jewelry is still nail jewelry.
A Simple Professional Workflow Can Reduce Shifting
Consistency makes intricate services easier. A practical salon workflow can include planning placement before adhesive application, checking how the charm sits against the nail curvature, selecting an appropriate attachment product, using a controlled amount of material, placing the charm precisely with a pickup tool, checking alignment from multiple angles, and curing according to the manufacturer's instructions.
After curing, inspect the decoration before finishing the service. If a charm visibly moves when it should already be secured, that is the time to address it rather than sending the client home and hoping optimism qualifies as an adhesive system.
Technicians expanding dimensional services can explore Professional Nail Care Collections, Professional Gel Polish, Acrylic Nail Supplies, and additional Nail Art Supplies for the back bar.
Practice Makes Charm Placement Much Faster
Precision improves quickly when technicians practice with several charm styles instead of only one. Try working with round stones, elongated pieces, flat metal charms, curved designs, and larger statement elements. Each teaches something different about product quantity, balance, orientation, and nail curvature.
Practice tips can also be useful for testing designs before offering them during paid appointments. The goal is to learn how a particular combination of products behaves before a client is sitting across the table watching one little gold bow slowly rotate toward freedom.
The Tiny Twirl Is Usually Telling You Something
When nail charms spin or shift before they are fully secured, the movement is usually useful feedback. The attachment product may be too fluid, the charm may not have enough support underneath it, the nail curvature may not match the charm base, there may be too much or too little product, or the finger may simply be moving before the decoration is set.
Once professionals begin looking at charm placement as a combination of product control, geometry, timing, and technique, these miniature decorations become much more predictable. Stock the right nail charms, precision tools, professional nail products, and decorative supplies for the services you offer, then develop a repeatable application process that works with your preferred systems. Your designs stay where you intended, your appointments move more smoothly, and the only spinning happening at the nail table can be the client spinning her hand around afterward to admire the finished set.
