
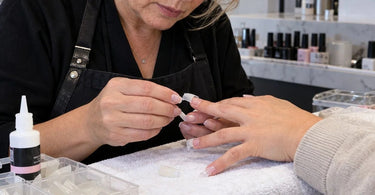
Achieve your goals faster by figuring out why those beautiful nail tips keep popping off before you even get to the fun part. You have prepped the natural nails, selected your tips, and lined everything up for a gorgeous set of extensions, only to watch a tip launch itself across the manicure table like it has somewhere better to be. Sound familiar? For busy nail technicians, premature tip detachment is more than an annoying little hiccup. It interrupts your service, wastes supplies, and can turn a straightforward appointment into an unexpected troubleshooting session. The good news is that most early tip adhesion failures have identifiable causes, and a few adjustments to your preparation, sizing, adhesive, and application technique can make a remarkable difference.
Whether you are creating acrylic extensions, preparing a traditional tip-and-overlay service, or working with another compatible nail enhancement system, understanding why tips separate before product application is essential. Let's investigate what is happening beneath those seemingly innocent little pieces of plastic and how to keep them exactly where they belong.
Why Do Nail Tips Pop Off Before Acrylic or Gel Application?
The short answer? Something is preventing the tip adhesive from forming or maintaining a reliable bond with the natural nail.
Traditional nail tips are designed to attach to the natural nail before an enhancement product is applied over them. Their initial attachment depends on the compatibility of the tip, the natural nail surface, the adhesive, and the application method. If any of those elements is working against you, the tip may lift, shift, or detach before the overlay process even begins.
The most common culprits include:
- Improper nail tip sizing or curvature.
- Residual oils, moisture, dust, or debris on the nail plate.
- Too much or too little nail adhesive.
- Incomplete contact between the tip and the natural nail.
- Insufficient adhesive setting time.
- Excessive pressure, bending, or manipulation immediately after attachment.
- Incompatible adhesive and tip application methods.
And here is an important distinction: a tip that pops off before enhancement product application is not necessarily experiencing the same problem as a completed acrylic or gel enhancement that lifts days later. The timing of the failure gives you valuable clues about where to start looking.
1. Your Nail Tips Might Be the Wrong Size
Let's begin with one of the biggest troublemakers in professional nail extension services: incorrect tip sizing.
A nail tip should fit comfortably from sidewall to sidewall without pinching the natural nail or extending onto the surrounding skin. It also needs to complement the natural nail's transverse curvature, commonly called the C-curve.
Choosing a tip that is too narrow creates tension. The plastic wants to return to its original shape, while the adhesive is expected to keep it stretched across a wider nail plate. That ongoing tension can weaken the attachment and encourage premature separation.
A tip that is too wide creates another problem. Excess material may interfere with the sidewalls or require significant adjustments before it sits properly.
Professional fix: Size every nail individually before applying adhesive. When a natural nail falls between available tip sizes, selecting the larger size and carefully refining the sides is often preferable to forcing a smaller tip into place.
Explore professional nail tips in different shapes and sizes so your workstation is prepared for the variety of natural nail beds that walk through your salon door.
2. The Natural Nail Has Invisible Oils or Moisture
A nail can look perfectly clean while still having enough residual oil or moisture to interfere with adhesion. Unfortunately, nail glue does not award bonus points for appearances.
Natural skin oils, lotion residue, cuticle oil, dust, water, and other contaminants can compromise contact between the adhesive and the nail surface.
Even touching a freshly prepared nail with your fingers can transfer oils back onto the plate.
Common preparation mistakes include:
- Applying hand cream shortly before tip attachment.
- Leaving filing dust along the sidewalls or free edge.
- Failing to remove residue from the nail surface.
- Using a cleansing product that leaves an incompatible film.
- Handling prepared nails with bare fingertips.
- Attaching tips before the nail surface has dried sufficiently.
Professional fix: Follow the preparation procedure recommended for your particular tip and adhesive system. Gently remove nonliving cuticle residue where appropriate, prepare the natural nail without aggressive abrasion, eliminate dust, and use a compatible nail cleanser or dehydrator when specified.
Stocking reliable Manicure Essentials and nail dehydrators can make a consistent preparation routine easier to maintain during busy salon days.
Remember that dehydrators, primers, and bonding agents have different purposes. They are not automatically interchangeable, and some products are intended for the enhancement stage rather than the initial attachment of a traditional nail tip.
3. The Nail Tip Does Not Match the Natural Nail's Curve
Here is a sneaky issue that can fool even experienced nail technicians. The tip may be the correct width but still have the wrong curvature.
Imagine trying to glue a strongly curved piece of plastic onto a relatively flat surface. You can press it into place temporarily, but the plastic may continue trying to spring back into its original shape.
That mechanical tension places stress on the adhesive bond.
The opposite mismatch can also happen. A tip that is too flat for a highly curved natural nail may contact the center while leaving gaps along the sides.
How to spot the problem: Before applying adhesive, place the tip against the natural nail and inspect the contact area from several angles. Look for uneven contact, gaps, pinching, or areas that require excessive force to hold the tip in position.
Professional fix: Choose a tip design with a compatible curve and contact area. For clients with particularly flat, curved, or irregular nail plates, a different tip style or a suitable alternative extension method may produce a better result.
A larger selection of Professional Nail Care Collections helps nail professionals accommodate different nail shapes instead of expecting one box of tips to work for everyone.
4. Too Much Nail Glue Can Be Just as Troublesome as Too Little
Ah, nail glue. The tiny bottle with enormous responsibilities.
When a tip refuses to stay attached, the natural reaction is often to add more adhesive. Unfortunately, flooding the contact area can create additional problems.
Excess adhesive may spill onto the surrounding skin, collect unevenly beneath the tip, or make placement more difficult. Insufficient adhesive, meanwhile, can leave areas without proper contact.
The goal is not to use the largest possible amount. It is to achieve the coverage specified by the adhesive manufacturer.
Professional fix: Use a professional nail glue intended for your tip system and follow its application instructions. Depending on the adhesive and tip design, the product may be applied to the tip's contact area, the natural nail, or both.
Avoid assuming that every nail glue behaves identically. Thin, fast-setting adhesives and thicker gap-filling formulations can perform differently on irregular nail surfaces.
Also, keep adhesive away from the skin. If accidental skin bonding occurs, do not forcibly pull the bonded surfaces apart; follow the product's safety instructions.
5. Air Pockets Are Hiding Beneath the Tip
Air pockets are not just a visual annoyance. They can indicate that the adhesive has failed to establish continuous contact across the intended bonding area.
When pockets form beneath a traditional nail tip, the adhesive may be concentrated in some areas while other sections have little or no contact.
Common causes include incorrect tip curvature, uneven adhesive distribution, poor positioning, and improper application angles.
Professional fix: For compatible traditional tip systems, position the tip at the angle recommended by the manufacturer and gently bring the contact area onto the prepared nail in a controlled motion. Many conventional systems use an angled placement that progressively brings the tip into contact with the nail and helps reduce trapped air.
Maintain steady, appropriate pressure while the adhesive sets. Avoid rocking the tip excessively or repeatedly lifting and repositioning it after the adhesive begins bonding.
If you notice a significant air pocket, do not simply cover the problem with acrylic or gel. Remove the poorly attached tip using an appropriate, safe method and reapply according to the system instructions.
6. You Are Releasing the Tip Before the Adhesive Has Set
Salon appointments run on schedules. We understand. But nail glue did not receive your appointment calendar.
Some adhesives establish an initial bond quickly, while others require a longer hold or different setting procedure. Temperature, product condition, application amount, and the specific formulation can influence performance.
Releasing pressure too early can allow the tip to shift or separate before the initial bond is established.
Professional fix: Follow the adhesive manufacturer's recommended hold and setting instructions. Maintain the tip in the correct position for the specified period without bending or disturbing it.
Once attached, allow the bond to develop as directed before trimming, filing, or otherwise manipulating the tip.
A few extra moments spent securing an attachment can save considerably more time than repeatedly replacing failed tips.
7. The Contact Area of the Tip Is Working Against You
Not all nail tips share the same contact design. Some have a full well, others feature a partial well, and some are manufactured without a traditional well.
These designs serve different application preferences and natural nail shapes. Problems arise when the selected contact area is unsuitable for the client's nail or the technician uses an attachment method intended for another tip style.
A deep well may sit awkwardly on certain nail beds. A poorly matched contact area can create gaps, interfere with positioning, or place unnecessary stress on the attachment.
Professional fix: Match the tip style to the natural nail and the enhancement procedure. Understand where the manufacturer intends the tip to sit and how much contact should be made with the natural nail.
Do not assume that a well-less tip, a traditional full-well tip, and a full-cover soft gel tip use the same bonding procedure.
For example, some full-cover gel systems require a specific gel adhesive and curing lamp, while traditional plastic tips typically use an appropriate nail tip adhesive before an acrylic or gel overlay is applied.
Explore full-well nail tips, half-well nail tips, and full-cover nail tips when selecting products for different services.
8. Filing and Trimming Are Putting Stress on a Fresh Bond
Your nail tip is attached. Success! Then you reach for the tip cutter, apply pressure, and suddenly the tip is no longer attached.
That is an especially frustrating moment because the initial adhesive application may have been acceptable.
Freshly attached tips can experience mechanical stress during trimming, shaping, blending, or aggressive filing. Excessive force can challenge the connection before the nail has received its supporting overlay.
Professional fix: Allow the adhesive to reach its recommended initial set before manipulating the tip. Use sharp, appropriate cutting tools and stabilize the nail while working.
When filing, support the extension and use controlled pressure. Avoid bending the tip back and forth or placing unnecessary leverage on the adhesive contact area.
Reliable Nail Files & Buffers and nail tip cutters help technicians maintain a more controlled workflow.
And remember: the completed enhancement's strength should come from the correctly designed acrylic or gel structure, not from expecting an unreinforced plastic tip to tolerate every possible mechanical force.
9. Your Nail Adhesive May Be Old, Contaminated, or Improperly Stored
Sometimes the culprit is not your technique. It is the adhesive bottle quietly causing chaos in the background.
Adhesives have storage requirements and usable shelf lives. Exposure to unsuitable temperatures, moisture, contamination, or repeated improper handling can affect product performance.
A bottle that has thickened unexpectedly, developed an obstructed applicator, or otherwise changed from its normal condition deserves attention.
Professional fix: Store nail adhesives according to manufacturer directions, keep containers properly closed, and check expiration or recommended use periods where provided.
Never pour old adhesive into a new container or mix products in an attempt to restore performance.
If several correctly fitted and prepared tips suddenly begin failing with the same adhesive, investigate the adhesive's condition and compatibility before assuming every client's nails are the problem.
10. The Natural Nails Require a Different Approach
Not every nail plate behaves like the perfectly uniform practice nails used in training demonstrations. Real clients bring real variations in shape, curvature, surface texture, flexibility, and length.
Very short or bitten nails may provide limited attachment area. Highly curved nails can be difficult to match with standard tips. Irregular or damaged nail plates may not support a conventional tip application reliably.
These situations require professional judgment rather than extra force or more glue.
Professional fix: Evaluate each client's natural nails before selecting an extension method. A different tip profile, appropriately selected adhesive system, or sculpted extension may be more suitable than trying to force a poorly fitting tip to work.
If a nail shows signs of infection, unexplained discoloration, pain, or significant damage, avoid covering the issue with an enhancement and recommend appropriate medical evaluation when warranted.
Healthy service practices protect both your clients and your professional reputation.
How to Troubleshoot Nail Tips That Keep Popping Off
Instead of restarting the entire service and hoping for better luck, use the timing and appearance of the failure to narrow down the cause.
- The tip springs away immediately: Check the width, C-curve, and overall fit. Mechanical tension may be overcoming the initial bond.
- The tip slides during placement: Review adhesive quantity, surface preparation, application pressure, and setting time.
- Visible bubbles appear beneath the tip: Inspect the contact area, adhesive coverage, natural nail contour, and placement technique.
- The tip attaches but separates during trimming: Assess the adhesive setting procedure and the mechanical force being applied.
- Multiple clients suddenly experience the same issue: Check adhesive storage, product condition, new supplies, and any recent changes to your preparation process.
- Only certain natural nail shapes have problems: Review tip selection and consider alternative extension methods.
This simple approach helps distinguish an isolated fit problem from a repeatable workflow issue.
A Better Step-by-Step Routine for Traditional Nail Tip Application
Want a more reliable routine for your next round of professional nail extensions? Use this general checklist while following the specific directions for your products.
Step 1: Assess the natural nails. Examine nail shape, condition, curvature, length, and suitability for extensions.
Step 2: Complete proper preparation. Follow professional sanitation procedures, gently prepare the nail surface, remove appropriate nonliving residue, and eliminate dust and contaminants.
Step 3: Preselect every tip. Check sidewall-to-sidewall coverage and curvature before opening the adhesive. Refine oversized tips where appropriate rather than forcing undersized ones.
Step 4: Verify the contact area. Make sure the selected tip sits correctly against the natural nail without excessive pressure or visible gaps.
Step 5: Apply compatible adhesive. Use the quantity, placement, and method recommended for your tip-and-adhesive combination.
Step 6: Position carefully. Follow the specified placement angle and stop point, taking care to avoid trapped air and contact with surrounding skin.
Step 7: Maintain pressure while setting. Hold the tip securely for the manufacturer's recommended period without unnecessary movement.
Step 8: Check attachment. Visually inspect the tip before continuing. Do not aggressively pull or pry at the newly formed bond to test it.
Step 9: Trim and refine with control. Allow adequate setting time and support the tip while performing the next steps.
Step 10: Apply the enhancement system correctly. Follow the manufacturer's instructions for any additional preparation, priming, acrylic, gel, or other compatible overlay materials.
For professional supplies that support this routine, explore Acrylic Nail Supplies and Nail Brushes & Tools.
Does Nail Primer Help Keep Tips From Popping Off?
This is a common question, and the answer depends on the products being used.
Nail primers and bonding agents are often formulated to improve adhesion between the natural nail and a particular enhancement product. That does not mean every primer should be applied beneath every nail tip adhesive.
Some traditional systems require adhesive attachment before the primer used for the overlay. Other compatible systems may specify a different sequence.
Applying an incompatible product or using primer excessively can create problems instead of solving them.
The rule: Follow the complete application protocol for your selected system. Never treat additional primer as a universal solution for tips that have not been fitted or attached correctly.
Browse nail primers and nail bonding products with attention to their intended use and compatibility.
Can You Reuse a Nail Tip That Already Popped Off?
In a professional salon setting, replacing a detached tip is generally the more dependable approach, especially if adhesive residue, distortion, contamination, or damage may affect its contact surface.
Do not simply apply another layer of glue over the failed bond and hope that the second attempt will behave better.
Instead, evaluate why the original attachment failed. Safely remove any remaining adhesive as directed, reassess the natural nail and tip fit, and prepare for a fresh application using an appropriate replacement tip.
Single-use product instructions and salon infection-control requirements should always take priority.
Why Keeping the Right Nail Supplies in Stock Matters
For salon owners and independent nail technicians, successful tip application is partly a technique issue and partly an inventory issue.
If your workstation offers only one tip curvature or a limited size selection, you may find yourself trying to make unsuitable products fit clients whose natural nails require something different.
That is not efficient, and it is certainly not the kind of creativity that makes your appointment book profitable.
A professional extension workstation should have appropriately selected supplies for the services offered, including multiple tip sizes and styles, compatible adhesives, nail preparation products, files, buffers, and suitable cutting tools.
Organized storage also makes it easier to monitor adhesive condition and avoid reaching for questionable supplies during an appointment.
Explore Professional Nail Care Collections, Manicure Essentials, and Nail Tables and Manicure Stations for products that support a practical and efficient salon setup.
Pure Spa Direct supplies professional nail and beauty products from manufacturers and brands serving salon and spa businesses. As a distributor rather than a manufacturer, we encourage nail professionals to select compatible products and follow the instructions provided by their respective manufacturers.
Frequently Asked Questions About Nail Tips Popping Off
Why do my nail tips fall off immediately after I glue them?
Immediate detachment often points to incorrect sizing, mismatched curvature, contaminated nail surfaces, incomplete adhesive contact, or inadequate setting time. Start by checking fit before increasing the amount of glue.
Should I buff the natural nail before applying tips?
Many professional systems require gentle surface preparation to remove shine and residue, but the correct method depends on the products being used. Follow manufacturer directions and avoid excessive filing that could thin or damage the natural nail.
Can too much nail glue make tips pop off?
Yes. Excess adhesive can contribute to uneven application, overflow, or placement difficulties. Use the amount recommended for your adhesive and tip design rather than assuming more glue creates a stronger attachment.
Why does only one nail tip keep popping off?
One troublesome nail may have a different width, curvature, surface condition, or available contact area than the others. Evaluate that nail individually rather than repeating the same application method without adjustments.
Do nail tips need to be completely dry before acrylic application?
Traditional nail tip adhesive must reach the appropriate set specified by its manufacturer before subsequent manipulation and product application. Different adhesives have different setting requirements, so do not rely on one universal drying time.
Will acrylic hold a loose nail tip in place?
Applying acrylic over an inadequately attached tip is not a reliable repair. A poorly bonded tip can create a weak foundation for the finished enhancement. Correct the attachment problem before proceeding.
Are full-cover gel tips applied the same way as traditional plastic nail tips?
Not necessarily. Full-cover gel systems may require specific preparation products, gel adhesives, curing equipment, and application methods. Use the manufacturer's complete instructions for the particular system rather than substituting a traditional tip application routine.
Make Nail Tip Pop-Offs a Rare Salon Surprise
Nail tips popping off before product application can make even the most organized appointment feel like a miniature game of catch. Fortunately, the solution is often less dramatic than the flying nail tip itself.
Focus on accurate sizing, compatible curvature, careful nail preparation, proper adhesive coverage, controlled placement, and sufficient setting time. When the foundation is secure, the rest of your enhancement service has a much better starting point.
And if the same problem keeps appearing, resist the temptation to reach for more glue automatically. Inspect the contact area, question the fit, evaluate your products, and adjust the technique based on what the failure is telling you.
Ready to make your nail extension station a little more prepared and a lot less dramatic? Explore the professional nail care supplies, nail tips, nail adhesives, and acrylic essentials available through Pure Spa Direct. Because your nail artistry deserves a solid foundation, and your freshly attached nail tips should not be planning their escape before the service even begins.
