
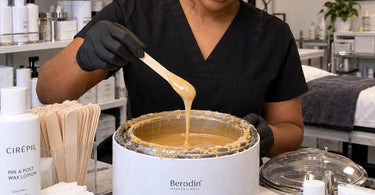
Clients notice this every single time... or at least, the observant ones do! Your treatment room looks beautiful, your supplies are organized, and your professional wax warmer is ready for another busy day. But right around the edge of that warmer sits a mysterious little mountain range of hardened wax. Where did it come from? Why does it keep growing? And how does a perfectly respectable waxing station suddenly develop what looks like a tiny volcano made entirely of sticky beauty products? The good news is that wax buildup around the rim is incredibly common, and understanding why it happens can make your equipment easier to maintain, your workstation more attractive, and your daily waxing routine much less frustrating.
For professional estheticians, waxing specialists, and salon owners, the wax warmer is one of the hardest-working pieces of equipment in the treatment room. It heats up before appointments, stays ready throughout busy service blocks, and handles countless dips of applicators into melted wax. With all that activity, a little mess is practically inevitable. However, there is a big difference between an occasional drip and a thick ring of wax that seems determined to become a permanent part of the equipment.
Understanding the causes of that buildup is the first step toward preventing it. From overloaded applicators to warmer temperature and container design, several small details can contribute to the problem. Fortunately, most are easy to improve with a few practical changes.
Why Does Wax Collect Around the Rim in the First Place?
The most common explanation is surprisingly simple: wax travels on the applicator, and not all of it makes it to the client.
Every time an esthetician dips a spatula into a warmer, the applicator picks up melted wax. As the spatula moves out of the pot, excess product may drip, stretch into strings, or slide down the applicator. If the spatula brushes against the rim, some wax transfers directly onto that surface.
One small drip might seem insignificant. Repeat the same movement dozens of times throughout the day, however, and those little deposits begin collecting into a noticeable ring.
As the wax cools, it thickens or hardens. Subsequent drips may stick to the existing buildup, gradually creating layers that become increasingly difficult to remove.
Think of it as the waxing equivalent of that mysterious coffee stain that keeps appearing on the office counter. Nobody remembers making the mess, but somehow everyone contributes.
Reason #1: Too Much Wax on the Applicator
One of the biggest causes of rim buildup is loading more wax onto the spatula than the application requires.
A heavily loaded applicator may look efficient, especially when waxing larger areas. Unfortunately, excess product increases the likelihood of dripping while moving from the warmer to the treatment area.
When the spatula passes over the rim, the extra wax may drop onto the edge or stretch into thin strands that eventually settle against the warmer.
Professional technique can make a noticeable difference. Using appropriately sized wax spatulas and applicators allows estheticians to collect an amount of product suited to each treatment area.
Smaller facial areas usually require less wax than legs or larger body sections. Choosing the right applicator helps control product placement without constantly fighting runaway drips.
Try lifting the spatula slowly and rotating it over the pot as appropriate for the wax formula. Allowing excess product to settle back into the container before moving toward the client can help reduce mess.
The goal is controlled application, not carrying enough wax to renovate the treatment room.
Reason #2: The Wax Temperature Is Not Quite Right
Wax consistency plays a major role in how easily product drips or stretches across the warmer rim.
When wax is hotter than its recommended working range, it may become unusually fluid. That thinner consistency can encourage dripping from applicators and make it harder to control the amount being lifted from the pot.
On the other hand, wax that is too cool may become thick, stringy, or difficult to work with. As an applicator moves away from the warmer, strands can stretch between the tool and the container, eventually breaking and landing around the rim.
Different professional hard wax and soft strip wax formulas have their own recommended operating temperatures and application consistencies.
Rather than relying on one temperature setting for every formula, follow the wax manufacturer instructions and the warmer operating guidelines. Allow enough time for the product to reach a consistent texture, stir as directed, and always verify that the wax is safe for skin before application.
Remember that a warmer dial setting does not necessarily represent the exact temperature of the wax itself.
If wax suddenly starts dripping more than usual, check its consistency before assuming your spatula technique is the problem.
Reason #3: Scraping the Spatula Along the Edge
Many waxing professionals instinctively wipe excess wax against the side of the container before beginning an application.
It seems perfectly reasonable. After all, the extra wax needs somewhere to go.
The problem develops when that wiping motion repeatedly deposits product on the upper rim rather than allowing it to return cleanly inside the wax container.
Over time, the rim becomes a collection point for everything removed from the spatula. The first layer cools, additional wax adheres, and eventually the edge develops a thick coating.
A better approach is to refine the loading motion. Collect a controlled amount of wax, keep movements centered over the container, and avoid dragging product across exposed exterior edges.
When removing excess wax from an applicator, use a technique compatible with the formula and equipment that keeps the product inside the container without contaminating the wax supply.
Never return used applicators or wax exposed to a client back into the pot. Follow single-use applicator practices and applicable salon sanitation requirements to prevent cross-contamination.
A cleaner rim is wonderful, but safe waxing technique always comes first.
Reason #4: The Wax Container Is Too Full
There is something deeply satisfying about looking at a freshly filled wax warmer before a busy appointment schedule.
Unfortunately, filling the pot too close to the top can make even careful application messy.
As wax melts and is stirred, the surface moves. A nearly full container leaves little room for that movement, increasing the chance that product will contact the rim.
Removing a spatula from an overfilled pot can also push wax outward, especially when working quickly.
Follow the warmer manufacturer fill limits and account for the displacement created by applicators and stirring tools. Leave appropriate space between the wax surface and the container rim.
Refilling in manageable amounts according to product instructions may be easier than repeatedly working from an overloaded container.
However, add fresh wax only according to the manufacturer directions and your facility sanitation procedures. Never reuse contaminated product.
More wax in the pot does not automatically mean more efficiency. Sometimes it just means more cleanup and a very sticky afternoon.
Reason #5: Repeated Heating and Cooling Creates Layers
Wax buildup often becomes more noticeable after several days of regular warmer use.
During a busy service day, small amounts of product collect around the edge. As the warmer cools, those deposits begin to firm up. When the equipment is used again, the residue may soften without fully disappearing.
Fresh drips can then adhere to the older wax, creating another layer.
This repeated buildup explains why a thin ring can gradually become a stubborn ridge that seems almost attached to the equipment.
Depending on the wax formula, exposed residue may also collect lint, dust, or other debris from the surrounding workstation.
Leaving these deposits in place makes later cleaning more difficult. It also creates unnecessary visual clutter in a treatment room where clients expect clean, professionally maintained equipment.
Fortunately, a consistent cleaning routine is much easier than tackling several weeks of accumulated wax in one heroic battle.
Reason #6: The Warmer Design Leaves the Rim Exposed
Not every wax warmer has the same container shape, rim width, or protective accessories.
Some warmers use removable metal inserts or standard wax cans, while others have different interior designs. A wider exposed rim may provide more surface area for drips to collect.
Depending on the model, the warmer may accommodate protective collars that help catch wax before it reaches the equipment housing.
These accessories are especially useful in high-volume waxing rooms where applicators move in and out of the pot throughout the day.
Explore wax warmer collars and other professional waxing accessories when evaluating ways to minimize cleanup.
Always select collars or inserts that are compatible with the specific warmer and wax container. A poorly fitting accessory can interfere with proper equipment use rather than improve it.
How to Clean Wax Buildup Around the Warmer Rim
Once wax has collected around the edge, the next question is how to remove it without damaging the warmer.
The safest cleaning approach depends on the equipment construction, surface coating, and wax formula. Always consult the manufacturer instructions before choosing a cleaning product or removal method.
Step 1: Turn off and unplug the warmer. Disconnect the equipment before cleaning. Allow it to reach a safe handling temperature. Some manufacturers recommend cleaning while residual wax is still slightly pliable, but the warmer must never be hot enough to create a burn risk.
Step 2: Remove loose wax carefully. If the manufacturer permits, use a suitable nonabrasive implement to gently lift softened residue from the rim. Avoid forcing hardened wax away with knives, metal scrapers, or other sharp tools that could damage the finish.
Step 3: Choose a compatible wax remover. A professional wax-cleaning product may help loosen remaining residue. Browse wax cleaners and review product directions to confirm compatibility with the warmer surface.
Step 4: Apply cleaner to a cloth when appropriate. Rather than pouring or spraying liquid directly onto electrical equipment, use the application method specified by the cleaner and warmer manufacturers. Keep liquid away from switches, electrical connections, ventilation openings, and heating components.
Step 5: Wipe the rim and surrounding surfaces. Use a soft disposable towel or other approved cleaning material to lift loosened residue. Repeat as needed rather than scrubbing aggressively.
Step 6: Complete required sanitation procedures. Removing sticky wax and disinfecting a surface are not the same thing. After residue removal, follow applicable regulations and equipment instructions for cleaning and disinfecting surfaces that require it. Use an approved disinfectant with the proper contact time where compatible.
Step 7: Allow surfaces to dry before reuse. Make sure the warmer is clean, dry, and ready for safe operation before reconnecting it.
Never immerse the electrical warmer base in water or use an unapproved chemical solvent. Removable inserts may have separate cleaning requirements, so treat them according to their instructions rather than assuming they can be cleaned exactly like the base.
Daily Habits That Help Prevent the Sticky Ring
Preventing wax buildup usually requires several small habits rather than one dramatic equipment makeover.
Start by paying attention to how applicators are loaded and lifted. Controlled product amounts reduce excess dripping, while slower movements over the pot give wax time to settle before the applicator leaves the container.
Keep the warmer appropriately filled and positioned on a stable, level surface. A crowded workstation makes accidental bumps and messy movements more likely.
When supported by the equipment manufacturer, use protective collars to catch incidental drips. Replace disposable collars as needed and whenever contaminated.
Inspect the rim regularly throughout the service day. Address spills at safe intervals using approved cleaning procedures, rather than allowing residue to build into a thick layer.
Finally, establish a closing routine that includes checking the warmer rim, lid, exterior housing, and surrounding workstation.
These small practices help keep your professional waxing supplies organized and ready for the next appointment.
Hard Wax vs. Soft Wax: Does the Type of Wax Matter?
Different wax formulas can leave different types of residue around the warmer.
Hard wax typically becomes firmer as it cools, so stray drips may form raised beads, strings, or hardened ridges along the edge of the container.
Soft wax generally remains more adhesive and may leave thin, tacky films that spread across surrounding surfaces. Its cleanup needs can differ depending on the formula.
Even products within the same category can behave differently because ingredients and recommended operating temperatures vary.
For example, professionals exploring ItalWax hard and soft wax, Berodin, or Cirepil should follow the particular product directions rather than treating every wax as interchangeable.
The key is maintaining the appropriate consistency and using cleaning products suited to both the wax residue and the warmer materials.
When Wax Buildup Signals a Bigger Equipment Problem
Most rim buildup comes from ordinary drips and application habits. However, unusual changes deserve closer attention.
If wax repeatedly overflows despite proper filling, confirm that the container is correctly seated and that the warmer is operating according to manufacturer specifications.
If residue is accompanied by unusual odors, smoking, erratic heating, damaged electrical components, or a malfunctioning temperature control, stop using the equipment and follow manufacturer service guidance.
Do not attempt to repair electrical heating components yourself unless you are specifically qualified and authorized to do so.
Similarly, examine removable inserts for damaged coatings, warping, or other wear that could affect normal operation or safe cleaning.
Sometimes a persistent mess is simply a technique issue. Other times, aging equipment or an incompatible insert deserves an upgrade.
Browse Professional Wax Warmers for Salons & Spas when evaluating suitable equipment for your treatment volume and preferred waxing formulas.
Why a Clean Wax Warmer Matters to the Client Experience
Clients may not know the technical details of wax temperature, applicator loading, or the difference between hard and soft wax.
They do, however, notice the overall condition of their surroundings.
A treatment room with organized supplies, clean work surfaces, and well-maintained equipment communicates attention to detail. That matters especially during services where clients rely on the professional to follow careful hygiene practices.
Visible wax residue does not automatically indicate that a service is unsafe, but neglected equipment can raise understandable questions about cleanliness.
A regular maintenance routine also supports smoother room resets. Instead of spending valuable preparation time removing stubborn deposits, estheticians can focus on preparing the station, replenishing single-use supplies, and making the next client comfortable.
For busy salon owners, those little operational improvements add up.
After all, nobody schedules an afternoon of back-to-back waxing appointments because they secretly dream of spending the evening scraping a wax warmer.
Build a Smarter Waxing Station
Keeping wax buildup under control becomes easier when your workstation supports efficient, consistent service.
Begin with a reliable warmer that matches your preferred wax type and service volume. Keep compatible disposable collars, correctly sized applicators, approved cleaners, and suitable wiping materials within convenient reach.
Professional wax applicators can help with controlled product placement, while waxing accessories and removers support routine equipment maintenance.
For additional treatment-room essentials, explore Professional Cotton, Sponges, and Wipes and Professional Cleaners & Disinfectants for Salons and Spas.
Store cleaning products separately from treatment materials and follow their labels and compatibility instructions. Keep electrical equipment away from liquids and maintain clear, uncluttered working space around hot surfaces.
For teams with multiple waxing specialists, standardized setup and closing procedures can also reduce variation between shifts. When everyone follows the same basic equipment-care routine, maintaining a clean station becomes much simpler.
Frequently Asked Questions About Wax Warmer Rim Buildup
Why does hard wax form a crust around the warmer rim?
Hard wax can collect around the rim when applicators drip, wax strings stretch across the edge, or excess product is repeatedly wiped onto the container. As those deposits cool, they harden and form layers.
Can wax warmer collars prevent buildup?
Compatible collars can help protect the warmer housing from incidental drips and spills. They do not eliminate the need for cleaning, careful applicator technique, or routine sanitation.
Should I scrape hardened wax off the rim?
Avoid aggressive scraping, sharp metal tools, and abrasive cleaning methods. Follow manufacturer guidance for safely softening and removing residue without damaging the warmer surface.
How often should professional wax warmers be cleaned?
Remove spills and inspect equipment as part of regular daily operations, with additional cleaning as required by service volume, manufacturer instructions, and applicable sanitation rules. Removable inserts and exterior components may require different care procedures.
Does warmer temperature affect wax buildup?
Yes. Wax that is excessively fluid may drip more easily, while wax that is too cool may become stringy or difficult to handle. Follow the recommended working conditions for the specific wax formula and verify safe application temperature.
Can I use ordinary household cleaning chemicals on my warmer?
Do not assume a household cleaner is safe for wax residue or electrical equipment. Choose products approved for the warmer materials and follow both the cleaner and equipment manufacturer instructions.
The Bottom Line: Less Wax on the Rim, More Time for Clients
Wax buildup around the warmer rim is usually the result of ordinary application habits repeated throughout a busy workday. Excess product on applicators, unsuitable wax consistency, scraping motions, overfilled containers, and repeated heating and cooling can all contribute to that stubborn ring.
The solution is not complicated. Use controlled applicator techniques, maintain proper wax consistency, avoid overfilling, select compatible protective accessories, and establish a consistent cleaning routine.
Those practical habits can help keep your equipment looking professional while reducing unnecessary cleanup between appointments.
At Pure Spa Direct, we know that busy beauty professionals have better things to do than battle hardened wax every evening. As a distributor of professional spa, salon, and beauty supplies, we make it easier to shop for the equipment and everyday essentials that support an efficient treatment room.
Explore our Waxing Supplies for Professionals, browse professional wax warmers, and discover waxing accessories and removers to help keep your workstation organized and service-ready.
Because the only thing that should be building up during your waxing appointments is your list of happy, returning clients. Not a miniature wax mountain around the warmer!
