Experience the difference quality makes when you stop letting your most stunning nail creations live and die on Instagram stories. We're talking about building a proper, professional, and downright irresistible Nail Art archive. Think of it as a visual menu so delicious, clients can't help but point and say, "I want THAT!" This isn't just about showing off your skills (though, let's be real, you should absolutely show off those skills); it's a strategic business tool that saves you time, upsells services, and turns indecisive clients into your biggest fans. Let's transform that camera roll full of masterpieces into your most powerful booking engine.
How many times has a client sat down, looked you dead in the eye, and said, "Just do whatever you want!" It's both a blessing and a curse. A blessing because creative freedom! A curse because... where do you even start? And what if your "whatever" isn"t their "whatever"? An archive eliminates the guesswork. It gives clients a concrete starting point, allowing them to mix, match, and customize designs they can already see on a real hand. It's the ultimate solution for "I don't know what I want, but I'll know it when I see it."
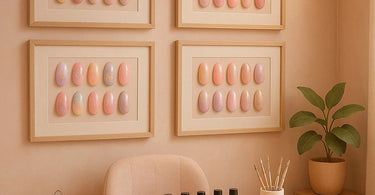
Step 1: The Great Nail Photo Shoot - Capturing Your Art in Its Best Light
Before you can archive, you need amazing source material. This means taking photos that do your work justice. You don't need a professional studio setup, but you do need to pay attention to a few key details. First, lighting is everything. Natural, indirect light is your best friend. Avoid harsh shadows or the yellow tint of overhead lights. A simple photo box or a well-lit spot by a window can work wonders.
Next, consider the background. A clean, neutral background—like a plain towel, a high-quality spa towel, or even a simple piece of paper—lets the nails be the star. Keep the focus on the art. Make sure the client's hand is clean and well-groomed, with a dab of cuticle oil to make the nails shine. Get shots from different angles: a top-down view, a side profile, and a "hand model" pose. The goal is to show the design in a way that's both accurate and aspirational.
Step 2: Organize Your Masterpieces - From Digital Chaos to Salon-Ready Catalog
Now, what to do with all these photos? Leaving them scattered across your phone's camera roll is a recipe for "I know I did a gorgeous flamingo design once but I can't find it now." You need a system. There are several ways to tackle this, from simple to sophisticated.
Option A: The Social Media Power Move. Create a dedicated Instagram or Pinterest account *just* for your nail art. This is fantastic because it's inherently shareable. You can create albums or boards for different categories: "Birthday Nails," "Bridal Elegance," "Abstract Art," "Seasonal Designs." When a client is planning her bachelorette party, you can send her a direct link to your "Bridal Party" board. Easy peasy.
Option B: The Digital Photo Album. Use a cloud service like Google Photos or Apple's iCloud. Create albums with clear, searchable names. The advantage here is privacy and control. You can easily pull up these albums on a tablet during consultations. Speaking of tablets, having a dedicated device, like an iPad, at your nail table is a game-changer. It looks professional and is much more impressive than scrolling through a tiny phone screen.
Option C: The Old-School Physical Portfolio. Don't underestimate the power of print! Having a beautifully bound book of your best work can be incredibly impactful during consultations. It feels luxurious and permanent. You can use a service like Shutterfly or Artifact Uprising to create a high-quality photo book. This is especially great for your absolute top-tier designs.
Step 3: Tag, You're It! Making Your Archive Instantly Searchable
Organization is key. Simply having photos in an album isn't enough; you need to be able to find a specific design in seconds. This is where tagging comes in. For every photo you save, note key elements. What technique did you use? Was it gel polish, dipping powder, or acrylic? What colors were used? (Pro tip: note the brand and shade name if you can!). What themes does it fit? (e.g., floral, geometric, holiday, French tip, ombre). What nail art rhinestones or charms did you incorporate?
This metadata is your secret weapon. When a client says, "I want something pink and sparkly for my vacation," you can search your archive for "pink," "sparkle," and "vacation" and have a dozen options at your fingertips. It makes you look like a mind-reading nail genius.
Step 4: The Art of the Consultation - How to Use Your Archive to Close the Sale
This is where the magic happens. Your archive isn't a static collection; it's an interactive tool. During the consultation, guide your client through your archive. Instead of asking the overwhelming "What do you want?" try a more targeted approach: "Are you leaning towards something bold or subtle today?" "Let's look at some designs that would look amazing with your skin tone."
Use your archive to upsell effortlessly. A client booking a basic manicure might see a design that requires nail art supplies and be willing to pay extra for it. You can also show variations: "We did this design with a blue base, but we could easily do it with the new OPI shade you love." This collaborative process makes the client feel involved and excited, virtually guaranteeing they'll love the result.
Step 5: Keep It Fresh! Maintaining Your Nail Art Library
An outdated archive is almost as bad as no archive at all. Make it a habit to add new designs every week. At the end of each day, take a minute to upload and tag your favorite sets. Also, don't be afraid to retire older designs that no longer represent your best work or current trends. Your archive should be a living, breathing portfolio that grows with your skills.
The Ultimate Tool Kit for Flawless Nail Art Archives
To create the best possible photos for your archive, make sure you're stocked with the right tools. Crisp, clean nails start with a perfect canvas, so ensure you have the best nail files and buffers. A good LED lamp is non-negotiable for curing gels properly and achieving that lasting shine. For those intricate designs, invest in quality nail brushes and tools. And remember, healthy nails are beautiful nails, so always finish with a nourishing nail treatment.
Building a nail art archive might seem like one more task on a long list, but it's one of the highest-return investments you can make in your nail business. It streamlines your consultations, boosts your average ticket price, and solidifies your reputation as a true artist. So, go on, start curating! Your future fully-booked schedule will thank you.