
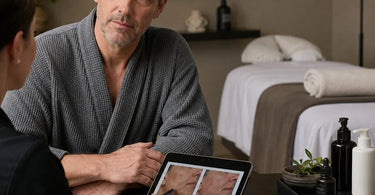
Achieve better results with smarter solutions... Starting with the way you showcase your work. Let's be real: before-and-after photos are the holy grail of marketing for our industry. They're visual proof of your amazing skills. A picture of a flawless lash lift, a dramatic hair transformation, or a skin glow-up can speak louder than a thousand words. But there's a catch. Asking a client to be the 'before' can feel awkward, and posting their image without care can seriously backfire. The goal is to build trust and book more services, not to make your clients want to run and hide. So, how do you harness the power of these transformative images while keeping your clients feeling empowered, respected, and totally comfortable? Buckle up, because we're diving deep into the art of the stress-free before-and-after photo. Let's turn those potential awkward moments into your most powerful marketing asset, all without making anyone uncomfortable.
Let's be honest, the phrase 'before photo' can sometimes sound a bit like a polite way of saying, 'Okay, stand there so the world can see your un-polished state.' This can be a sensitive area, especially when we're talking about things like body treatments or services that clients might book to address a specific insecurity. Our primary goal is to make our clients feel amazing, not like they're starring in an unflattering documentary. The best way to do this? It starts before you even pick up your phone. The secret sauce is a combination of rock-solid consent, a killer setup, and a shift in how you talk about the photos. We're not documenting a flaw; we're documenting the incredible journey and the remarkable results of a skilled professional using top-tier products. It's all about the mindset, and we're here to help you master it.
Getting Consent: The Golden Rule (and Your Legal BFF)
This is non-negotiable. You cannot—and should not—post a photo of a client without their explicit, written permission. This isn't just about being polite; it's about building a foundation of trust and covering your business legally. Think of it as the first step in the 'making clients comfortable' journey.
Here's how to get it right and make it a seamless part of your process:
1. Have a dedicated photo consent form. This should be separate from your general service waivers. It should clearly state how the photos will be used (website, social media, marketing materials) and for how long. A form with clear, non-legal jargon is much less intimidating.
2. Ask before the service. When you're going over the treatment plan, casually mention, 'We often take before-and-after photos of our work to show off the results. Would you be open to that?' This gives them time to think and doesn't put them on the spot after a long facial when they're in a happy daze.
3. Normalize the conversation. If you treat it like a no-big-deal part of your service, they're more likely to as well. You could say something like, 'One of the ways I help potential clients understand the power of our lash lifts is by showing the transformation. Would you be okay with me taking some photos? We'll never post anything without a final sign-off.'
How to Take Flattering Photos (Without Drama)
Okay, consent is secured. Now, the actual photo shoot. The goal here is consistency. A well-executed set of photos will highlight your work and make your client look fantastic, which makes them more likely to be excited about sharing them. Here’s how to nail it:
1. Pick Your Spot and Stick to It: Choose a location in your spa or salon with clean, consistent lighting and a clutter-free background. A corner with natural light near a window is ideal, or you can invest in a simple ring light and a white backdrop. Mark the spot where clients should stand to ensure your before and after photos are identical in terms of angle and distance. This is key for showing the real transformation.
2. Master the Setup: Consistency is about more than the background. Make sure the lighting, camera angle, and distance from the subject are exactly the same for both the 'before' and 'after' shots. If you're shooting on a phone, tap the screen to focus on your client's face or the treatment area. This consistency makes the 'wow' factor of your work undeniable.
3. Posing 101: For the 'before' shot, keep it neutral. Have your client stand in a natural, relaxed position. For the 'after,' show a bit of personality! You could capture a confident smile, a happy, relaxed expression, or the movement in a new hairstyle. For services like waxing, this is a game-changer. It's no longer just about hair removal; it's about the client's newfound confidence and comfort.
4. Minimize Distractions: Check for stray hairs, jewelry, or a busy background. For a facial or microdermabrasion service, make sure the face is clean and makeup-free. For body photos, having clients wear the same simple, consistent clothing or a disposable garment is a great idea.
How to Share Photos on Social Media Like a Pro
You have the beautiful photos, you have the signed consent form—now what? How you present them on social media is just as important as how you took them.
1. Don't Just Post; Tell a Story: People connect with the 'bridge'—the story of the transformation. Instead of just a side-by-side, write a caption that explains what you did and the client's experience. For example: 'We gave our client a new look with a hair bleach and professional toner from Wella, and the results were stunning! They wanted a fresh, low-maintenance look, and we delivered.'
2. Make It About Them, Not You: Frame the transformation around the client's feelings. 'She walked in wanting more confidence for the upcoming summer season. After her sunless tanning session, she's glowing from the inside out!' This makes the post relatable and aspirational.
3. Get Creative with Storytelling: Instagram Stories and Reels are perfect for this. You can show a little video of the consultation, the process (with client permission!), and then the final reveal. It’s an interactive way to show the work that goes into the transformation.
4. Use Clear Calls-to-Action: Don't just leave people admiring the photo. Tell them what to do next! 'Feeling inspired? Come experience the magic for yourself. Link in bio!' or 'DM us to book your own transformation.'
Empower Your Clients (And Your Marketing!)
The goal of before-and-after photos is to show the power of your expertise. It's a marketing tool, but it's also a testament to your skills and the quality of the products you use. When you approach it with professionalism, transparency, and a focus on your client's comfort, the photos become a powerful asset you can both be proud of. They build trust with future clients, and they make your current clients feel like VIPs.
Ready to start capturing those amazing transformations? Pure Spa Direct has everything you need to provide top-tier services. Explore our collections below to ensure you're always on the cutting edge of the spa and salon industry:
- Professional Lash and Brow Tint
- ItalWax Hard and Soft Wax
- Advanced Facial Treatment Products
- Professional Hair Color
- Premium Skincare Products
So, take a deep breath. With these tips, you can confidently use the power of before-and-after photos to market your services, all while keeping your clients as comfortable and empowered as the day they walked in. Now go get those amazing shots!
