Take your work from good to great by mastering the art of wax removal like a pro. Let's face it, dealing with stubborn hard wax stuck in your wax warmer is like trying to scrape dried glitter off a table—annoying, messy, and oddly persistent. But fear not, because we've got the inside scoop on how to remove hard wax from your warmer faster than a client changes their mind about bangs.
Whether you're using ItalWax, Lycon, or another premium brand, these tips will save you time, frustration, and maybe even your favorite spatula. Because let's be real—no one has time to chisel wax out like it's the Ice Age.
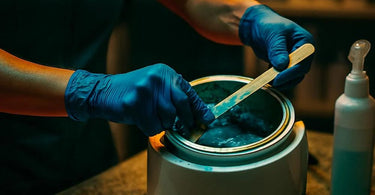
1. The Hot Potato Method (But with Wax)
Here's a little secret: wax is like that one ex who won't leave—it clings harder when it's cold. So, turn your warmer back on and let the wax melt completely. Once it's liquid gold, grab a wax spatula and gently scrape the sides. The wax should slide right off, leaving your warmer looking fresher than a post-facial glow.
2. The Oil Slick Trick
If your wax warmer is giving you the silent treatment (read: stubborn residue), a little oil can be your best friend. Use a few drops of cuticle oil or even coconut oil on a paper towel. Wipe down the warmer while it's still warm (but not scorching hot). The oil breaks down the wax, making cleanup a breeze. Plus, your warmer will smell like a tropical vacation—bonus!
3. The Freezer Finesse
For those "I-will-never-budge" wax situations, pop the wax container (if removable) into the freezer for 10-15 minutes. The wax will contract and harden, making it easy to pop out in one satisfying chunk. It's like waxing poetic, but with less poetry and more efficiency.
4. The Paper Towel Press
This one's for the wax warmers with no removable container. While the wax is melted, press a folded paper towel onto the surface and let it soak up the liquid wax. Replace as needed until the warmer is clean. It's like blotting lipstick, but for your equipment. Pro tip: use professional cotton pads for extra absorption.
5. The Spatula Tango
If you're dealing with a wax crust along the rim, a metal spatula is your dance partner. Gently glide it along the edges to lift the wax without scratching the surface. Think of it as a mini excavation project—minus the dirt and the Indiana Jones hat.
6. The Wax-Off Wax (Yes, Really)
For the love of smooth surfaces, never use water to clean your wax warmer. Wax and water mix like oil and vinegar—except less salad dressing, more mess. Instead, use a dedicated wax remover or isopropyl alcohol for a streak-free finish.
7. The Prevention Game
The best way to avoid wax buildup? Line your warmer with wax paper or a disposable liner before adding new wax. It's like a condom for your warmer—protection is key. Plus, cleanup is as easy as tossing the liner and starting fresh.
Final Thoughts
Removing hard wax from your warmer doesn't have to feel like a WWE match. With these pro tips, you'll spend less time scraping and more time perfecting those flawless waxing services. And if all else fails, remember: a little pre-wax oil goes a long way in keeping your warmer in tip-top shape. Now go forth and wax on, wax off—mess-free!