Simplify your workflow, improve your results... and maybe even save your clients from a few unexpected 'man-scaping' mishaps. Let's talk about a service that strikes fear into the hearts of many a client but is actually a fantastic, high-profit addition to your menu: ear and nose waxing. Sure, the thought of ripping hair from nostrils might make you wince, but for your clients, especially the gents, it's a game-changer. They're tired of the endless plucking, the harsh trimmers, and the rogue hairs that seem to sprout overnight. That's where you, the savvy pro, step in with a safe, quick, and almost magical solution. And honestly, if you can make someone's ear look like a pristine, hairless masterpiece while they barely flinch, you deserve a medal (or at least a hefty tip).
Nose and ear hair might be nature's way of filtering out dust and debris, but when it starts resembling a jungle, it's time to step in . The goal isn't to clear out the entire cave, just the visible, unruly bits at the entrance. It's about aesthetic grooming, not a full-on ear canal dredging. Trust me, the anatomy has its purposes, and we respect that. We're just giving it a little trim from the root.
Why Hard Wax is Your BFF for Facial Hair
Before we get into the nitty-gritty, let's talk about the star of the show: hard wax. For the sensitive, curvy, and generally awkward terrain of the nose and ears, soft wax and strips are a recipe for disaster. We're all about hard wax. It adheres to the hair, not the skin, which means less pain and a much lower risk of lifting delicate skin . And for the love of all that is holy, do not even think about sticking a wooden spatula or wax deep into the nostril. Hair and wax should be applied to what you can see. It's a rule. Live by it .
Speaking of which, our friends at Berodin and ItalWax have some stellar options that are firm, flexible, and perfect for the job . Their formulations are designed for coarse, stubborn hairs—the kind you find sprouting from nostrils and inner ears. The goal is to find a wax that sets up quickly but remains flexible enough to come off in one smooth, clean piece.
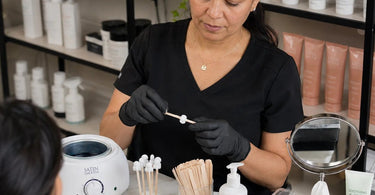
Step-by-Step: Taming the Ears
Ears are like the awkward cousin at the family reunion—everyone knows they're there, but no one wants to deal with them. With a little finesse, though, they can be a breeze. Always start with a thorough consultation. Ask about medications (like Accutane) or any skin sensitivities. A good pre-wax cleanser is non-negotiable to remove any oils or lotions that could prevent the wax from gripping the hair .
Here's the move: Using a clean wax spatula, apply a thin, even layer of hard wax to the inside rim of the ear where the hair is visible. Do not, I repeat, do not get wax in the ear canal. That's a ticket to Irritation City.
Once the wax is set—it should feel firm but not rock hard—hold the skin taut. Then, with a swift and confident motion, pull the wax off in the opposite direction of the hair growth. It's over before they can even say 'ouch' .
Conquering the Nostrils: A Quick Tug
This is the big one. Everyone's scared of it. And you know what? It's not that bad. The key is speed and accuracy. A professional stripless hard wax is your weapon of choice here .
Using a fresh applicator, scoop a small pea-sized amount of wax. You're going to apply a small strip inside the nostril. Again, we're just dealing with the visible part of the entrance. Some techs prefer to do one nostril at a time, which is totally fine .
Pro Tip: Because the nostril is a warm, cozy environment, the wax takes a bit longer to set . Be patient! Wait until it's completely dry and matte before you attempt to remove it. Then, with a good grip and a confident pull, remove it quickly in the opposite direction of the hair growth. The sharp sting is over in a split second.
Aftercare is just as important as the wax itself. Apply a soothing post-wax oil or lotion to calm the skin and reduce redness. ItalWax's pre- and post-wax products are a fantastic choice for this, designed to be gentle and effective on sensitive skin.
For any residual stickiness, a post-wax residue remover is your best friend. A clean finish is a happy client .
Tools of the Trade
Having the right equipment is half the battle. A professional wax warmer that maintains a consistent, safe temperature is crucial. You don't want to burn your client, nor do you want wax that's too cold to work with .
You'll also want a good stock of professional wax spatulas and applicators. Always use a fresh, clean spatula for each dip—re-dipping is a one-way ticket to bacterial Cross-Contamination City, and nobody wants to visit that place. For a more tailored approach, look into applicators specifically designed for these sensitive areas.
Stocking up on a complete waxing kit can also simplify your workflow, giving you everything you need for a seamless service. And remember, the quality of your strips and accessories can make or break a treatment .
Ultimately, offering ear and nose waxing is a brilliant way to expand your services and show your clients you're a true expert in all things hair removal. With the right ItalWax, Berodin, or Cirepil products from Pure Spa Direct, and the correct technique, you'll turn a once-feared service into a quick, easy, and highly requested appointment . Now go forth and de-fuzz those ears!