Start every task with confidence... especially when it involves keeping your clients safe from icky germs and bacteria. Let's face it, nobody wants to leave your salon with a fabulous manicure and a side of fungal infection. Properly sanitizing your nail tools isn't just about following regulations (though that's important too) - it's about showing your clients you care about their health as much as their cuticles. And let's be honest, a clean salon is a busy salon - word gets around fast when someone gets more than they bargained for during a spa day.
In this guide, we'll walk through the step-by-step process of keeping your tools squeaky clean, the products that make sanitation a breeze, and some pro tips to make this crucial task as efficient as possible. Because let's be real - you've got nails to paint and clients to pamper, and nobody has time for cross-contamination catastrophes.
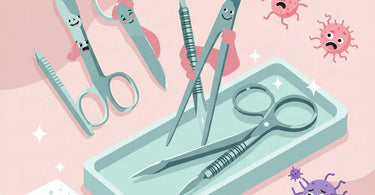
The Dirty Truth About Nail Tools
Your manicure tools might look shiny and innocent, but they can harbor all sorts of microscopic party crashers. Bacteria, fungi, viruses - they're all waiting for the chance to hitch a ride from one client to the next. And while we're all for sharing the love, sharing infections is definitely not part of your service menu.
Common culprits hiding on improperly cleaned tools include staph infections, warts, fungal infections (hello, greenies!), and even hepatitis in extreme cases. Not exactly the kind of free gift with purchase your clients are hoping for. The good news? Proper sanitation stops these uninvited guests in their tracks.
Your Sanitization Starter Kit
Before we dive into the how-to, let's talk about the what-you-need. Stock up on these sanitation superheroes:
1. Hospital-Grade Disinfectant: Look for EPA-registered disinfectants specifically designed for salon use. These bad boys are tough on germs but gentle on your tools. Our professional cleaners and disinfectants collection has options that won't let you down.
2. Ultrasonic Cleaner: This magical device uses sound waves to blast away debris from every nook and cranny of your tools. Think of it as a mini Jacuzzi for your implements - but with way more cleaning power.
3. Autoclave or Dry Heat Sterilizer: For tools that can handle the heat (literally), these provide the highest level of sterilization. They're like the heavy artillery in your sanitation arsenal.
4. Barbicide or Similar Solution: The iconic blue liquid isn't just for show - it's a disinfecting powerhouse for your metal tools. Plus, it makes your salon look legitimately professional.
5. Clean, Dedicated Towels: Because wiping tools on your apron or (gasp!) your pants is a definite no-no. Our high-quality salon towels are up for the job.
The Step-by-Step Sanitation Dance
Now that you've got your supplies, let's walk through the sanitation samba:
Step 1: Pre-Clean
After each client, wipe tools with a clean paper towel to remove visible debris. For stubborn gunk (looking at you, acrylic remnants), use a stiff brush. This step is like brushing your teeth before going to the dentist - it makes the deep cleaning way more effective.
Step 2: Wash
Use warm water and antibacterial soap to give tools a thorough scrub. Pay special attention to hinges and crevices where gunk likes to hide. This is where an ultrasonic cleaner can really shine - it gets into places your fingers can't.
Step 3: Disinfect
Submerge tools in your EPA-registered disinfectant solution for the recommended time (usually 10-15 minutes). Pro tip: Use a timer - guessing leads to either under-disinfected tools or unnecessarily long waits.
Step 4: Rinse & Dry
After disinfecting, rinse tools with clean water and pat dry with a fresh towel or let air dry on a clean surface. Moisture is bacteria's BFF, so make sure everything is completely dry before storage.
Step 5: Sterilize (When Needed)
For tools that break the skin (like cuticle nippers), follow up with sterilization in an autoclave or dry heat sterilizer. These tools require the extra step because they're the overachievers of infection risk.
Step 6: Store Properly
Keep clean tools in a closed container or UV sterilizer until their next use. An open tray might look Instagram-worthy, but it's basically a welcome mat for airborne contaminants.
Tool-Specific Tips
Different tools need slightly different TLC:
Metal Tools (Cuticle Pushers, Nippers, etc.): These can handle the full sanitation treatment - washing, disinfecting, and sterilization. Just make sure to oil hinges occasionally to prevent rust.
Nail Files & Buffers: These are the one-hit wonders of the nail world. Once used, they should be tossed (emery boards) or properly disinfected (glass or metal files). Our nail files and buffers collection includes disposable options that make sanitation simple.
Electric Tools: Never submerge these! Wipe down surfaces with disinfectant wipes and use brush attachments to clean bits and guards. Always unplug before cleaning - because electrocution is definitely not an add-on service clients are looking for.
Foot Spa Basins: These require special attention between clients. Use a hospital-grade disinfectant and follow the manufacturer's instructions. Consider pedicure chairs with pipeless systems to minimize contamination risks.
When to Say Goodbye
Even the best-loved tools eventually need to retire. Replace files and buffers after each use (or if reusable, when they stop performing). Metal tools should be replaced when they become pitted, rusted, or dull - typically every 6-12 months with proper care. A dull nipper is more dangerous than a sharp one, as it can tear rather than cut cleanly.
Client Communication is Key
Don't keep your sanitation efforts a secret - clients appreciate knowing you're taking their safety seriously. Some ways to showcase your cleanliness:
- Keep your sanitation station visible but organized (no one wants to see a chaotic mess of dirty tools)
- Use fresh linens for each client (our hygienic table paper is perfect for quick changes)
- Open sealed packages of files/buffers in front of clients
- Briefly explain your sanitation process if asked (but keep it light - no need for horror stories)
Common Sanitation Slip-Ups
Even seasoned pros can fall into these traps:
The "Quick Dip": Dunking tools for a few seconds doesn't cut it. Follow manufacturer times for proper disinfection.
Overcrowding: Stuffing too many tools in a disinfectant container prevents proper coverage. Give them space to soak properly.
Solution Fatigue: Disinfectants lose potency over time. Change solutions according to instructions, not just when they look dirty.
Glove Guilt: Wearing gloves doesn't replace tool sanitation. Gloves protect you, but clean tools protect everyone.
Making Sanitation a Seamless Part of Your Service
The key to consistent sanitation is making it part of your workflow, not an extra chore. Try these time-savers:
- Have multiple sets of tools so you can rotate while others are disinfecting
- Set up a sanitation station within easy reach of your work area
- Create a checklist until the process becomes second nature
- Invest in quality salon disinfectants that work efficiently
Remember, proper tool sanitation isn't just about avoiding trouble - it's about building trust. When clients see you prioritizing their health, they'll keep coming back (and telling their friends). Plus, there's nothing more satisfying than knowing you're delivering beautiful nails without any nasty surprises. Now go forth and disinfect like the professional you are - your clients (and their immune systems) will thank you!