Enhancing your clients' natural beauty by tinting their lashes and brows can elevate their look from 'Oh, nice' to 'Wow, fabulous!'—and who doesn't want to be the fairy godmother behind that transformation? With Intensive's Eyelash and Brow Tint, you can achieve stunning, long-lasting results that will have your clients batting their lashes and raising their brows in delight. Let's dive into the step-by-step process to ensure you apply tint like the true beauty wizard you are.
Preparation: Setting the Stage for Tinting Triumph
Before you begin, ensure you have all the necessary supplies at your fingertips. Here's your beauty arsenal:
- Intensive Colorant Cream (your client's chosen shade)
- Intensive Cream Developer
- Intensive Make-up Remover Foam
- Intensive Applicator Brush
- Glass Dappen Dish or Plastic Cup
- Wooden or Plastic Mixing Sticks
- Protective Eye Pads
- Skin Protection Cream
- Cotton Rounds or Esthetic Wipes
- Gloves (because tint-stained hands are so last season)
- Tissues
- Eye Wash or Eye Wash Station (safety first!)
- Cotton Swabs
- Timer (to keep things on track)
Step 1: The All-Important Patch Test
We know, waiting 24 to 48 hours can feel like an eternity, but performing a patch test is crucial to ensure your client doesn't have an allergic reaction. Apply a small amount of the mixed tint behind their ear or on the inner forearm, let it sit for 2 minutes, then remove. If there's no irritation after 24-48 hours, you're good to go. Patience is a virtue, darling!
Step 2: Prepping the Canvas
Start by cleansing the client's lashes and brows with Intensive Make-up Remover Foam to remove any makeup, oil, or residue. Clean lashes and brows are like a blank canvas, ready for your masterpiece.
Step 3: Mixing the Magic Potion
In your glass dappen dish, mix equal parts Intensive Colorant Cream and Intensive Cream Developer (a 1:1 ratio) until you achieve a creamy paste. Not too runny, not too thick—think Goldilocks perfection.
Step 4: Protecting the Skin
Apply a thick layer of skin protection cream under the lower eyelid and around the brows to prevent any accidental skin staining. Place protective eye pads under the lower lashes; this keeps the tint where it belongs and not on your client's freshly moisturized skin.
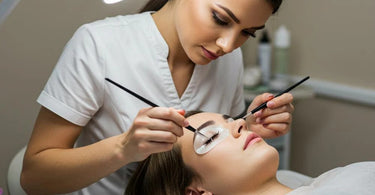
Step 5: Applying the Tint—Lower Lashes First
With your client looking up, use the Intensive Applicator Brush to apply the tint to the lower lashes, ensuring each lash, even those sneaky corner ones, are fully coated from base to tip. Once done, have your client close their eyes for the remainder of the application. This isn't nap time, but it's close!
Step 6: Upper Lashes—The Grand Finale
Apply the tint to the upper lashes, again ensuring full coverage. Precision is key here; you're aiming for even, thorough application without clumps. Remember, you're a pro, not a Picasso—no abstract art here!
Step 7: Brows—Frame Those Windows to the Soul
Using the applicator brush, apply the tint to the brows, following the natural shape and ensuring all hairs are covered. For a more defined look, you can use a fine brush to outline the desired brow shape before filling it in. Brows on fleek, as the kids say!
Step 8: Timing Is Everything
Set your timer: 10 minutes for lashes and 3 minutes for brows. Keep in mind, the longer the tint stays on, the darker the result. So unless your client is channeling their inner goth, stick to the recommended times.
Step 9: The Reveal—Removing the Tint
Gently remove the protective eye pads. Using a damp cotton round, wipe away the tint from the lashes and brows in a downward motion until no residue remains. Hold a tissue near the eye area to catch any excess water. Voilà! Instant glam.
Step 10: Aftercare Advice—Keeping the Glam Going
Advise your client to avoid oil-based makeup removers and heavy creams around the eye area, as these can cause the tint to fade faster. With proper care, their enhanced lashes and brows can last up to six weeks. That's six weeks of waking up fabulous!
By following these steps, you'll provide your clients with beautifully tinted lashes and brows, enhancing their natural beauty and boosting their confidence. Remember, practice makes perfect, and a touch of humor keeps the process enjoyable for both you and your clients. Happy tinting!